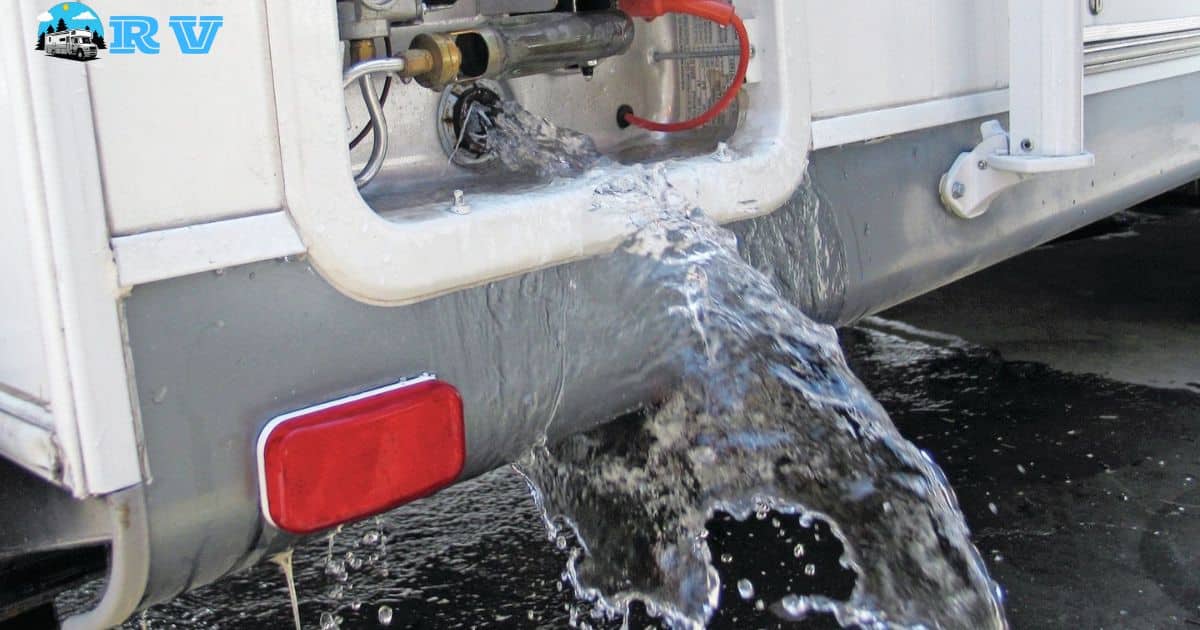
Recreational vehicles, commonly called RVs, can easily suffer from water damage if owners are not careful. RVs have many systems that use water, like sinks, showers, and toilets. Problems with any of these systems can cause leaks inside the RV’s walls or floors. Water leaks are often not noticed right away either. This gives the water more time to cause damage to flooring, walls, cabinets, and furnishings.
There are also ways that water can get into an RV from the outside. Driving through heavy rain or storms can lead to water leaks if window seals and other external parts are not well maintained. Flooding is another exterior threat. If an RV is parked in a flood-prone area during heavy rains, water can rapidly enter and cause interior flooding.
Neglecting minor leaks and exterior maintenance greatly raises the risks of serious RV water damage over time. For a deeper understanding, we’ll examine the extent of water damage required to classify an RV as totaled.
What Causes Water Damage in RVs?
Water damage is one of the most common issues RVs face. There are several potential causes of water intrusion and resulting damage in RVs:
Inclement weather
Rain, snow, and hail can lead to exterior water leaks, especially around windows, doors, vents, and seals. Water may seep through tiny cracks and openings, causing interior damage over time. Wind-driven rain is particularly problematic.
Plumbing leaks
Faulty plumbing systems and connections are frequent culprits of interior water damage. Leaky pipes, water tanks, pumps, valves and fittings can all spring unexpected leaks, allowing water to soak walls, floors, and cabinetry. Clogged drains can overflow.
Tank overflows
Issues with freshwater, gray water, and black water tanks can lead to disastrous spills and flooding. Tanks can crack or valves can fail. Debris can jam valves open. Users making errors estimating tank levels can also accidentally overfill tanks.
Roof damage
RV roofs endure a lot of abuse from travel and the elements. Eventually, seals can fail, seams can separate, and water can penetrate to the interior. Hail impact, tree strikes, and other trauma can also damage the roof. Faulty roof installations can be prone to early leaking.
Water & Sun Damage
RV exteriors suffer water and sun damage from exposure. RVs sitting unused allows moisture intrusion. Sun UV rays degrade seals, decals, and surfaces. Fiberglass delamination over time from moisture. Wall panels bulge and deteriorate. Decals and stripes peel away. Metals rust prematurely. Seals and gaskets become brittle, crack, and leak.
Day and night temperature extremes worsen cracking from expansion and contraction. While darker gel coats and paints resist sun better than white, UV still fades and chalks paints. Oxidation worsens cracking. Monitoring seals, fixing leaks promptly, and waxing prevents major damage. White RVs need diligent inspection and upkeep to counter moisture and sunlight risks.
Punctures & Scrapes
RVs suffer frequent minor exterior damage from road debris and scrapes in transit. Gravel, rocks, and road trash easily ding, dent, and scratch RV sides. Low hanging tree limbs scrape roofs. Minor bumps and collisions scratch up front caps. Sharp items on campsites puncture tires. Debris dings and dents LP tanks and underbellies.
Punctures need quick repair to prevent further damage. Unrepaired scrapes allow moisture intrusion that causes major issues over time. Touch up paint prevents rust and blending scrapes reduces visible damage. Installing protective film guards against punctures, chips, and scratches. Careful inspections after trips catch damage early before problems compound.
Catching and repairing water damage early is critical to prevent mold issues and major RV repairs down the road. Routinely checking all plumbing components and seals can help spot problems before leaks occur or overwhelm the RV interior. Proper winterization and maintenance are key preventative measures as well. Staying on top of all potential water damage root causes reduces RV repair headaches.
Protecting Your RV from Water Damage
Since water damage is such a major issue in RVs, taking preventative steps is key. There are several effective ways RV owners can help protect their investment against leaks, flooding, and resultant water damage:
- Inspect seals regularly: Examine roof and exterior seals around windows, doors, hatches, and vents at least yearly. Look for cracks, gaps, and condition degradation that could allow moisture intrusion. Reseal as needed. Ensure slide out seals are tight.
- Maintain caulking and sealants: Check caulk integrity around roof fixtures, seams, and joints. Look for shrinkage cracks or gaps and recaulk as required to keep water out. Seal any exterior screw holes or penetrations.
- Wash and wax exterior: Clean roof and sides thoroughly and apply quality wax at least once yearly. Wax creates a protective barrier and helps water bead and run off.
- Install protective film: Application of protective paint film guards against road debris chips and scratches that compromise exterior RV walls over time.
- Check roof condition: Inspect roof material for damage or deformation that could cause leaks. Repair any minor damage found promptly.
- Practice leak prevention: Keep roof vents closed while traveling. Manage condensation and humidity inside the RV. Limit water usage when dry camping to reduce strain on tanks and plumbing.
Make water damage prevention steps part of regular RV maintenance. Catching problems early is the best way to avoid major repair bills and keep your RV lasting longer.
Is Your Water-Damaged RV Beyond Repair?
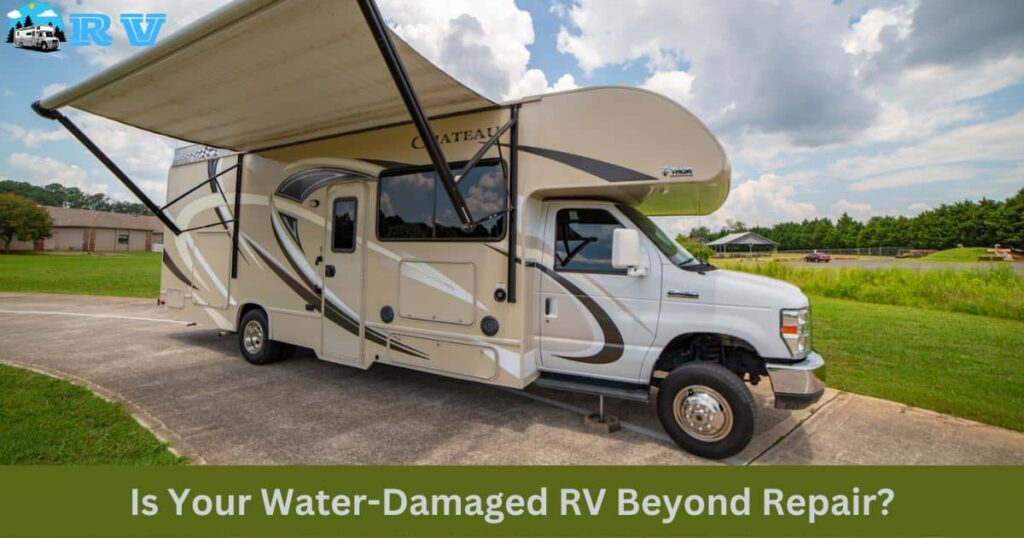
If your RV suffers extensive water damage, you may wonder if it’s reached the point of no return and repair is not feasible. Assessing the scope and repairs needed is key:
- Look for visible mold/mildew: If mold has spread across large interior sections that will require tearing out walls and ceilings, major repairs are likely needed.
- Check for delamination: If outer fiberglass or paneling walls are bulging or coming apart from inner wall framing, extensive disassembly and rebuilding work may be required.
- Evaluate floor condition: Water-logged floors that now feel “spongy” indicate soaked underlayment and flooring replacement needs. Bad smells signal mold spread underneath.
- Consider roof condition: A severely damaged, ultraviolet-degraded roof that now leaks substantially will demand a full replacement to prevent further water intrusion.
- Assess functional components: Do slide outs still operate properly without catching or sagging? Do doors/hatches close evenly without gaps? If water deformed aspects of the RV frame, chassis, or body, they’ll require heavy repairs.
- Estimate repair costs: Get professional assessments of repair scope and projected costs for issues found. If costs approach 50% or more of the RV’s prepandemic value, it may be beyond economical repair.
While most water damage can be fixed given time and money, cases with severe, multifaceted damage may exceed realistic repair limitations. Being fully informed aids difficult replacement-or-repair decisions.
RV Water Damage Repair Costs
Repairing water damage in RVs varies widely depending on factors like age, repair scope, and needed parts replacements. Repair costs can vary wildly, depending on the leak’s source and how much damage it’s caused.
Minor Mishaps: Think leaky faucet or cracked hose? You might get off easy with just $20-$200 for patching and replacing small parts.
Moderate Messes: A leaky roof or window letting in some rain? This could bump the price up to $500-$1,500, as you’ll need repairs and maybe some waterlogged materials replaced.
Major Mayhem: Extensive leaks or hidden mold? Brace yourself for $1,500-$2,800 or more. We’re talking major reconstruction, potentially involving walls, floors, and even appliances.
Appliance or HVAC repairs from water submersion add hundreds more. Plus teardown labor, dump fees, permitting costs, etc can significantly grow total bills. In severe cases, accumulated repairs reaching over 50% an RV’s value mean scrapping it becomes most economical. Research projected costs before assuming even extensive water issues are fixable. Repair bills add up rapidly.
Should I Buy an RV With Water Damage?
While repaired water damage doesn’t automatically make a used RV unusable, major moisture issues should give pause before buying. Small, well-documented leaks and repairs may be acceptable if repairs were done properly and extensive testing shows no lingering problems. However, extensive prior damage needing roof replacements or wall/floor tearouts indicates lingering reliability risks even if cosmetically fixed up.
Water damage can create electrical issues, mold, appliance failures down the road. No real way exists to check inside walls for hidden mold or wood rot. Unless the seller provides thorough documentation of professional repairs, extensive moisture damage remains a gamble long-term. The problems already surfaced once, so chances are good they may resurface and create headaches soon.
Does State Farm RV Insurance Cover Water Damage?

State Farm does provide coverage for both exterior and interior water damage in RVs, with some standard limitations and deductibles:
Physical damage insurance will pay for the RV’s roof, walls, flooring, and structure damaged by water. Flood policies may cover exterior freshwater flooding damage as well up to coverage limits.
The Replacement Cost Value (RCV) policy will repair or replace furniture, appliances and personal property impacted by water damage minus your deductible. Actual Cash Value (ACV) policies cover only the depreciated value of damaged items.
Loss of Use coverage will reimburse extra RV rental costs if yours is uninhabitable during covered repairs, subject to policy limits.
Mold damage stemming from sudden water leaks or flooding would be covered, as long as mitigation and elimination is pursued promptly. Preexisting or long-term neglected mold growth is viewed as maintenance.
Always review your specific State Farm RV policy regarding water damage causes, repair limitations, covered costs, and deductible obligations. Reporting claims promptly aids full damage reimbursement. Discuss concerns with your agent beforehand to ensure adequate safeguards against expensive water issues are in place.
How to Repair Water Damage in an RV Ceiling?
Repairing an RV ceiling suffering from water damage is labor intensive but necessary to prevent mold and future water risks. Follow these key repair steps:
First, you’ll need to fully open up the ceiling to see all of the damage. Remove vent covers, AC units, wiring conduits, and wooden ceiling panels to expose insulation, wood framing, hidden mold, etc. Inspect closely for dark, crumbling areas or sections still wet from leaks. Identify all moisture entry points that need roof repairs first.
Once roof leaks are addressed, remove all moldy, mildewed or wet insulation and dispose properly. Check the condition of wiring still in place and discard any corrosion. Take out any moist wooden rafters or panels as well. Treat all remaining ceiling wood with a strong antimicrobial solution to kill residual mold spores, letting it soak in adequately. Ventilate the interior space well.
Check seals around all roof fixtures and seams to prevent recurrence. Only once the ceiling structure is fully dried out should new insulation and wooden ceiling panels be reinstalled cleanly. Caulk and seal all edges thoroughly. Make sure to reconnect wiring securely. Test for leak points again during the next heavy rain. Addressing the full scope of water damage is vital to restoring your RV ceiling completely. Though disruptive, this teardown allows comprehensive fixing and sanitizing for lasting results.
How to Repair RV Wall Water Damage?
Saturated RV walls lead to bulges, mold, and deteriorating structural integrity over time. Proper repairs are crucial. Assessing and fixing wall damage involves:
Carefully examine the exterior first. Identify cracks, gaps or deformation allowing water intrusion. Reseal windows, doors, seams, etc accordingly. For major wall delamination or bubbles, the interior wall panels will likely need complete removal to dry out and rebuild the framed wall layers.
Open up the wall interior by unscrewing and taking out the affected panels. This exposes the wall framing and insulation to check for mold, rust, and soakage. Remove wet insulation completely and dispose properly. Check metal framing for rust; sand and paint or replace frame parts as needed.
Use a strong antimicrobial spray to treat all remaining wood studs and kill lingering mold spores. Allow to soak in well and ventilate the interior air. Address any plumbing leaks inside the walls that added to water damage as well.
Let the opened up wall cavity air out adequately to fully dry all wood before rebuilding. Cut and install new foam insulation panels snugly. Screw new wall paneling back in place overtop, caulking all edges to seal. Connecting joints between panels helps limit future water drives. Recheck exterior seals.
While tearing down RV walls is very disruptive, nothing short of full access can fix soaking wall damage correctly. Taking the proper steps restores structural integrity against worsening leaks or mold fungus down the road.
Does RV Insurance cover Water Damage?

Standard RV insurance generally does cover interior water damage from sudden leaks, storms, or floods minus your policy deductible. However, specific policy types, exclusions, and limitations exist on covering pre-existing issues, maintenance items like worn seals or roof condition, mold remediation delays, etc. Flooding damage often necessitates an add-on policy.
Carefully checking your insurance provisions for caps on water damage claims, exclusions if lack of maintenance contributed, requirements on mitigation speed, and deductible levels allows knowing exactly what your policy does and does not cover for expensive water repair scenarios down the road.
Frequently Asked Questions
Is it expensive to fix water damage on a camper?
Yes, camper water damage repairs are very expensive, often totaling thousands of dollars to fully fix leaks, replace damaged areas, and prevent mold.
How do you fix water damaged walls?
Fixing soaked camper walls requires completely removing the damaged inner wall paneling to access the wall framing, checking for rust and mold growth, spraying antifungal treatment, letting the wall cavity thoroughly air dry, installing new insulation, and screw new wall boards back in place.
How much damage does it take to total an RV?
Major damage reaching over 50% of the RV’s value before the incident typically totals it, since repairs plus the loss in resale make fixing it impractical.
How bad is water damage to an RV?
Excess moisture fosters mold growth inside walls and floors, rusts metal components, rots wood framing, electrical shorts and requires tearouts – making water damage extremely detrimental to RVs when left unchecked.
Conclusion
Though no definitive rule exists for declaring an RV a total loss, damage repair costs reaching over 50% of the vehicle’s pre-incident value is the general guideline used by many insurance carriers. With repair bills plus the subsequent loss of resale value combined, spending more than what remains of the RV’s undamaged worth becomes impractical. Of all the issues that can befall an RV, extensive water damage is most likely to exceed this total loss threshold if left unchecked.
Floods, storms and plumbing leaks can rapidly escalate from minor cleaning needs to full tear-outs of waterlogged walls, ceilings, floors and major components. Remediation costs stack up quickly with labor, permitting, mold abatement, parts/materials, system repairs and more. While RVs can justify high repair bills better than homes, the total still has its sensible limits before writing off the vehicle makes fiscal sense for insurers. Staying vigilant to fix leaks promptly or invest in preventative maintenance pays off by avoiding total loss scenarios.


