The term pressure to blow out RV water lines refers to the amount of air pressure required to effectively remove any residual water from the plumbing system of a recreational vehicle. This process is essential to prevent water freezing and causing damage during cold weather.
Preparing your RV for winter. Discover the key to protecting your plumbing from freezing temperatures: What pressure to blow out RV water lines. Learn the essential tips and tricks to keep your RV water system safe and sound all season long.
Pressure to blow out RV water lines refers to using compressed air to remove any remaining water from the plumbing system in a recreational vehicle to prevent freezing and damage during winter storage.
Understanding RV Water System Pressure
RV owners know that proper maintenance is key to preserving their investment. One critical aspect of this maintenance is winterizing the RV’s water system to prevent freezing and costly damage. Understanding the right pressure to blow out RV water lines is crucial for a successful winterization process.
When it comes to RV water systems, pressure is measured in pounds per square inch (PSI). The recommended pressure for blowing out RV water lines typically falls between 30 and 40 PSI. This range strikes a balance between effectively removing water from the system while avoiding damage to the pipes and fixtures.
Preparing Your RV for Winter: A Vital Step
Preparing your RV for the winter season is essential, especially if you live in an area with freezing temperatures. Failing to properly winterize your RV water system can lead to burst pipes, damaged fixtures, and costly repairs. One of the vital steps in this process is blowing out the water lines.
Blowing out RV water lines is essentially the process of removing all the water from the system, there’s no chance of freezing. This is achieved by using compressed air to push the water out of the pipes and fixtures. Doing this properly prevents ice expansion and potential damage. Always make winterization a part of your end-of-season routine to protect your RV from winter’s harsh effects.
Safe and Effective Pressure Levels
Determining the right pressure level to blow out RV water lines is crucial to prevent damage and ensure a successful winterization process. It’s generally recommended to use a pressure between 30 and 40 PSI when blowing out the lines. This range is safe for most RV water systems and effectively removes all water.
To maintain control over the pressure, use a dedicated RV air compressor with a built-in pressure regulator. This device allows you to set the desired PSI level and ensures a consistent and safe flow of compressed air. Always refer to your RV’s user manual for specific guidelines, as pressure recommendations can vary depending on the manufacturer and model.
Tools for Blowing Out RV Water Lines
Blowing out RV water lines requires specific tools and equipment to ensure a successful and thorough winterization process. Here’s a list of essential tools you’ll need:
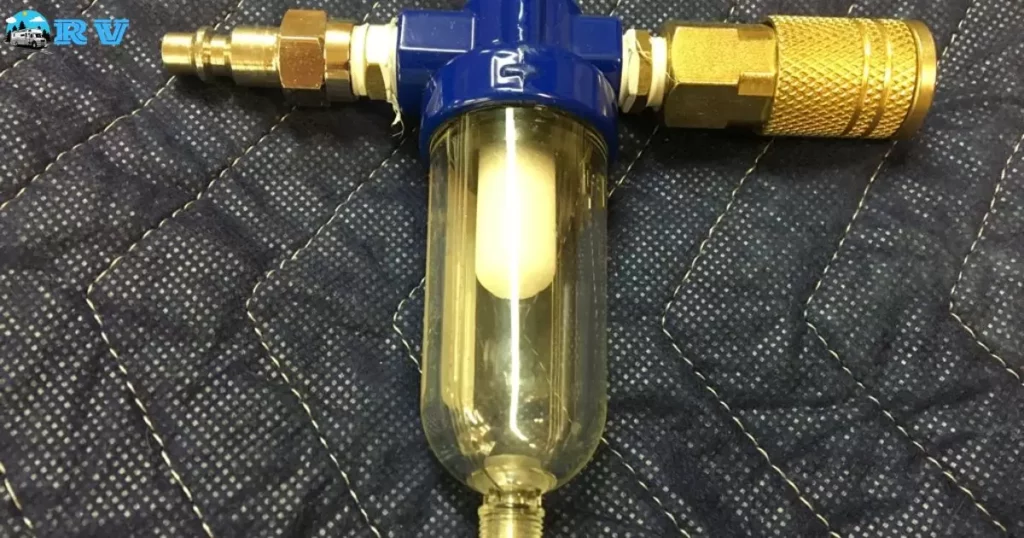
RV Air Compressor: A dedicated RV air compressor with a built-in pressure regulator is a must for maintaining the correct PSI when blowing out water lines.
Air Hose: You’ll need a hose to connect the air compressor to the RV’s water system. Ensure it’s long enough to reach all parts of your plumbing system.
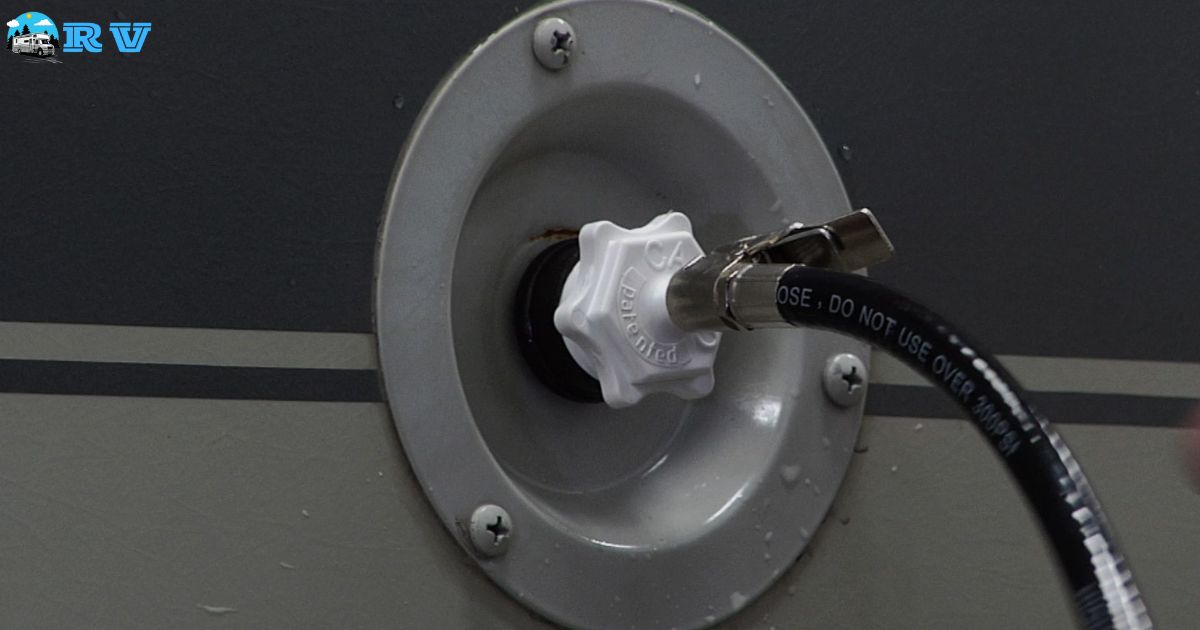
Blow-Out Plug: This adapter allows you to connect the air hose to the RV’s water inlet, ensuring a secure connection.
RV Antifreeze: After blowing out the lines, use RV antifreeze to protect any residual water in the P-traps and fixtures from freezing.
Guide to Blowing Out Water Lines
Blowing out RV water lines is a critical step in winterizing your recreational vehicle. Follow these steps for a successful and hassle-free process:
Turn Off Water Supply: Disconnect the RV from the city water supply and ensure the water heater is off.
Drain the System: Open all faucets, including hot and cold taps, to allow the water to drain from the pipes.
Connect the Compressor: Attach the air hose to the RV’s water inlet using a blow-out plug.
Set the Pressure: Adjust the pressure on the air compressor to the recommended range of 30 to 40 PSI.
Begin Blowing Out Lines: Start with the farthest faucet from the water inlet and work your way toward it. Open each faucet one by one, allowing the compressed air to blow out the water.
Don’t Forget Other Fixtures: Remember to blow out the toilet, shower, and any exterior water connections.
Empty Water Lines: Continue the process until no more water comes out of the fixtures.
Add RV Antifreeze: After blowing out the lines, pour RV antifreeze down each drain and toilet to protect P-traps and fixtures from freezing.
Common Mistakes to Avoid
When it comes to blowing out RV water lines, several common mistakes can lead to problems down the road. Here are some errors to avoid:
Using Excessive Pressure: Overpressurizing the system can damage pipes, fixtures, and seals. Stick to the recommended pressure range.
Skipping Fixtures: Neglecting to blow out all fixtures and faucets can leave water trapped in the lines, leading to freezing and potential damage.
Using the Wrong Compressor: A compressor without a built-in pressure regulator may lead to inconsistent pressure levels, increasing the risk of damage.
Forgetting RV Antifreeze: Failing to add RV antifreeze to the drains and toilet can result in frozen P-traps and fixtures.
Rushing the Process: Take your time to ensure all water is removed from the system thoroughly.
Tips for Maintaining Your RV Water System
In addition to knowing the right pressure to blow out RV water lines, there are other maintenance tips to keep your RV’s water system in top shape:
Regular Inspections: Periodically inspect your RV’s water system for leaks, worn hoses, or damaged fixtures.
Flush the System: Flush the system with fresh water after using it to remove any debris or sediment.
Monitor Water Quality: Be mindful of the water source at campgrounds to avoid potential contaminants.
Use a Water Pressure Regulator: Attach a water pressure regulator to your RV’s water inlet to protect against high-pressure water sources.
Drain Tanks When Not in Use: If your RV sits idle for extended periods, drain the fresh water tank to prevent stagnant water and bacteria growth.
Keep the System Clean: Regularly clean and sanitize the freshwater tank and system to prevent odors and bacteria.
Educate Yourself: Familiarize yourself with your specific RV’s water system by reading the manufacturer’s manual.
Winterizing for Peace of Mind
Winterizing your RV’s water system is a crucial step to protect your investment and prevent costly damage. Understanding the right pressure to blow out RV water lines is fundamental to this process. By following the recommended pressure range of 30 to 40 PSI, using the right tools, and avoiding common mistakes, you’ll ensure a successful winterization process.
Regular maintenance and care of your RV’s water system, in addition to proper winterization, will keep your recreational vehicle in top condition and ready for many more memorable adventures on the road. Take the time to winterize properly, and you’ll enjoy peace of mind knowing your RV is safe from the freezing temperatures of winter.
FAQs
Can I use a regular air compressor to blow out my RV water lines?
It’s not recommended, as regular air compressors often lack the necessary pressure control. Use a dedicated RV air compressor with a built-in pressure regulator.
What if I don’t blow out my RV water lines before winter?
Failing to winterize can lead to frozen and burst pipes, causing costly damage to your RV’s plumbing system.
How often should I perform RV water system maintenance?
Regularly inspect and maintain your RV’s water system throughout the year to prevent issues and ensure trouble-free adventures.
Conclusion
In wrapping up, knowing the right pressure to blow out RV water lines is a small but vital part of RV ownership. It helps protect your investment from the harsh effects of winter and ensures a trouble-free start to the next camping season. By following the recommended pressure range, using the right tools, and avoiding common mistakes, you’re on your way to maintaining a healthy RV plumbing system.
Remember, RV maintenance is about taking care of the little things to enjoy the big adventures, including transitioning your RV water heater from propane to electric. So, keep your RV’s water system in mind, stay safe on the road, and keep making memories with your home on wheels.


