
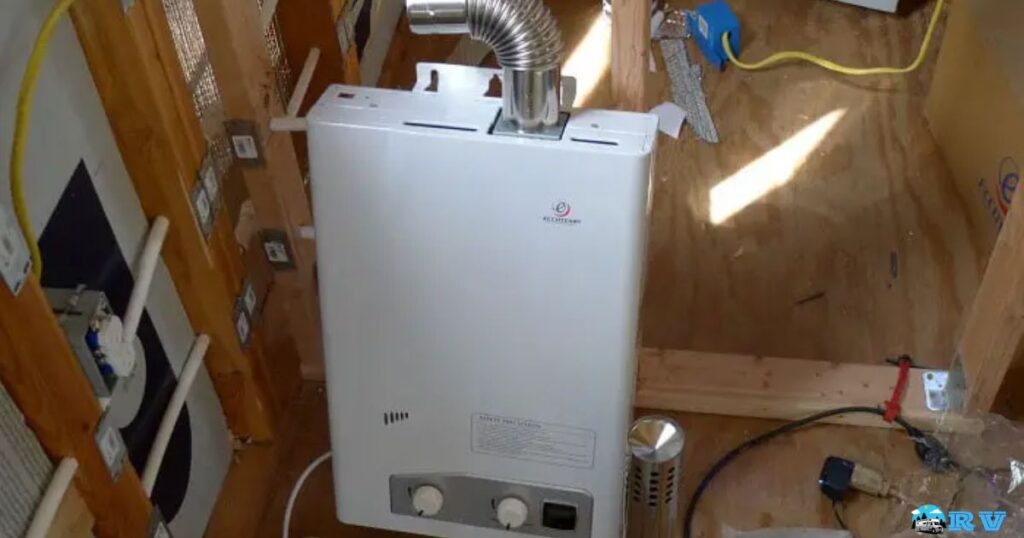
A tankless water heater in an RV is a modern solution for providing hot water on demand. Unlike traditional water heaters with storage tanks, these units heat water directly as it flows through the device. This system is ideal for RVs due to its compact size and efficiency.
Imagine having endless hot water during your RV adventures, without the wait or worry of running out. But how do you make this a reality? The question, how to install tankless water heater in RV? is crucial for those seeking a seamless and comfortable travel experience.
Installing a tankless water heater in an RV involves several steps. First, you must choose the right model that suits your RV’s space and power capabilities. Then, the installation process includes removing the old heater, fitting the new unit, and connecting it to the gas and water lines.
Understanding the Basics of Tankless Water Heaters for RVs
Tankless water heaters in RVs offer a continuous supply of hot water, unlike traditional heaters with tanks. They work by heating water directly as it passes through the unit. This method is more efficient and saves space, making it ideal for the limited space in RVs.
Tankless heaters can run on electricity, propane, or natural gas, offering flexibility for RV users. They’re a great upgrade for those who love to travel without sacrificing comfort. The efficiency of tankless water heaters is due to their on-demand heating capability.
Choosing the Right Tankless Water Heater for Your RV
Selecting the right tankless water heater for your RV is crucial for optimal performance. Consider the size of your RV and your hot water needs. A larger RV or higher water usage might require a heater with a higher flow rate. Additionally, think about the power source whether propane, natural gas, or electricity is more suitable for your travel style.
Another factor is the installation space. Tankless heaters come in various sizes, so choose one that fits well in your RV without overcrowding. Also, check the energy efficiency ratings. A more efficient unit can save you money in the long run, despite the initial higher cost. Lastly, consider the brand and read reviews for reliability and customer support, ensuring a smooth experience.
Tools and Materials Needed for Installation
| Tools and Materials | Description |
| Adjustable Wrenches | For tightening and loosening connections |
| Pipe Wrench | Specifically for gas and water pipe fittings |
| Screwdrivers | For opening panels and adjusting fittings |
| Tape Measure | To ensure proper spacing and fit |
| Pipe Cutter | For cutting water lines to size |
| Teflon Tape | For sealing threaded pipe connections |
| Drill and Drill Bits | For mounting the heater and creating openings |
| Pipe Insulation | To protect and insulate water lines |
| Venting Materials | Specific to the model, for safe exhaust |
| Electrical Supplies | Wires, connectors, and tools for electrical connections |
For installing a tankless water heater in your RV, specific tools and materials are needed. Adjustable wrenches, pipe wrenches, and screwdrivers are essential for handling various fittings and connections.
A tape measure is crucial to ensure the new heater fits in the designated space. Pipe cutters will be needed to adjust water lines, and Teflon tape is used to seal connections. You’ll need a drill with various bits for mounting the heater and creating any necessary openings. Insulating your pipes is essential, especially in colder climates, to prevent freezing.
Removing the Old Water Heater from Your RV
Removing the old water heater from your RV is a necessary step when upgrading to a tankless water heater. First, turn off the RV’s power and propane supply. Drain the old water heater by opening the pressure relief valve and removing the drain plug. Then, disconnect the water lines and propane connections.
Carefully uninstall the old unit, making sure to follow manufacturer instructions and safety precautions. Once removed, you can begin the installation of the new tankless water heater, which will provide you with hot water on-demand and save valuable space in your RV.
Preparing the Installation Site for a Tankless Water Heater
Preparing the installation site for a tankless water heater in an RV is crucial for its efficient and safe operation. Firstly, choose a suitable location inside the RV, ensuring it’s close to the water source and electrical supply. Clear any clutter and create ample space for the unit. Next, ensure proper ventilation to allow for combustion and venting of gases.
Install a high-quality gas line if required and secure it properly. Finally, check the water pressure and ensure it meets the heater’s specifications. By following these steps, you’ll ensure a smooth and successful installation of your tankless water heater, providing hot water whenever you need it while on the road.
Guide to Installing the Tankless Water Heater
Installing a tankless water heater in your RV is a straightforward process that can provide you with hot water on demand while saving space. To get started, gather all the necessary tools and materials, including the tankless water heater unit, propane or electric connections, and appropriate ventilation equipment.
First, turn off the RV’s water and propane supply, and then disconnect any existing water heater. Next, mount the tankless heater securely, connect the water and gas lines following the manufacturer’s instructions, and ensure proper ventilation to prevent carbon monoxide buildup.
Finally, test the unit, and you’ll have a reliable source of hot water in your RV for your next adventure. Remember to consult your RV’s manual and the specific tankless water heater’s instructions for a safe and successful installation. It’s a great upgrade that can make your RV trips more comfortable and enjoyable.
Connecting Gas Lines to the Tankless Water Heater
Connecting gas lines to a tankless water heater in an RV is a crucial step in the installation process. First, make sure to turn off the RV’s propane supply and double-check for any gas leaks. Then, use appropriate gas connectors and fittings to securely attach the gas line to the water heater.
It’s essential to follow the manufacturer’s instructions and consult a professional if you’re unsure about the connections. Properly connecting the gas lines ensures safe and efficient operation of your tankless water heater, providing you with hot water for your RV adventures without any worries about gas leaks or malfunctions.
Setting Up the Electrical Connections for Your Tankless Heater
Setting up the electrical connections for your tankless water heater in your RV is a crucial step to ensure a steady supply of hot water on the road. Begin by turning off the RV’s power source and locating the appropriate electrical panel. Then, carefully connect the wires from the heater to the designated breaker or fuse, following the manufacturer’s instructions closely.
Make sure the connections are secure and that there are no exposed wires. Once done, turn the power back on, and your tankless water heater should be ready to provide hot water whenever you need it during your travels. Remember to prioritize safety throughout the installation process to enjoy a warm shower in your RV hassle-free.
Water Line Installation for Tankless Water Heaters in RVs
Installing the water lines correctly is essential for the heater’s operation. Start by connecting the cold water line to the heater’s inlet. Use wrenches to secure the connections and check for any leaks. Then, connect the hot water line from the heater’s outlet. Ensure the pipes are well insulated, especially in areas prone to freezing.
If your RV has specific water line configurations, adapt the connections accordingly. Use fittings and adapters as needed to ensure a secure and leak-free installation. Remember, a proper water line connection ensures consistent water flow and temperature, enhancing your RV experience.
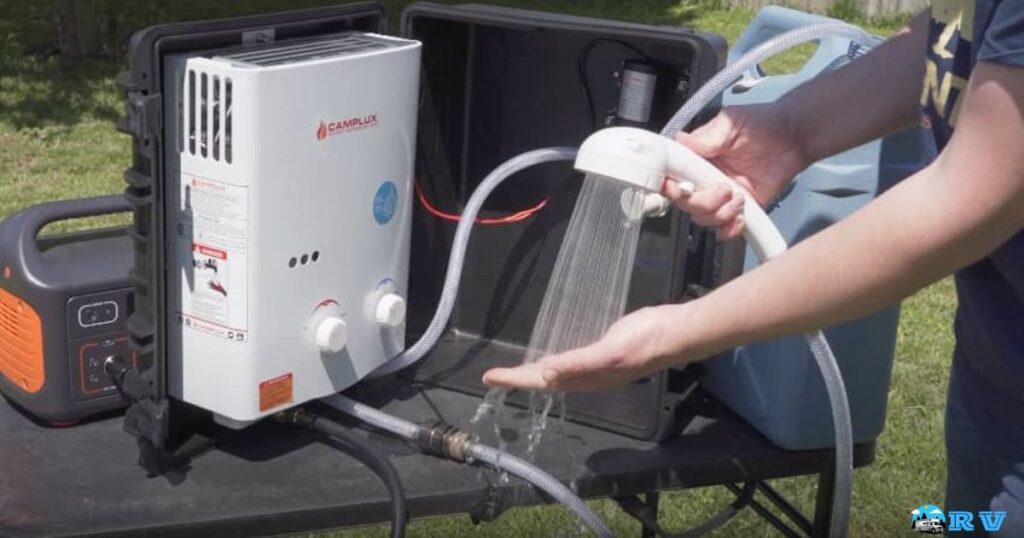
Testing the Tankless Water Heater After Installation
Once the tankless water heater is installed in your RV, it’s essential to test it to ensure it’s working correctly. To do this, simply turn on the hot water faucet and wait a few moments. You should feel a steady stream of hot water flowing from the tap. If there are any issues, such as low water pressure or no hot water, double-check the installation and connections to address any problems.
Make sure to set the desired hot water pressure on the heater according to your preferences. Testing the tankless water heater after installation ensures that you’ll have a reliable and efficient source of hot water pressure while traveling in your RV, making your adventures more comfortable and enjoyable.
Safety Considerations When Installing a Tankless Water Heater in an RV
Safety is paramount when installing a tankless water heater in an RV. Always follow the manufacturer’s instructions carefully. If using a gas-powered heater, ensure proper ventilation to prevent carbon monoxide buildup. Regularly check gas connections for leaks to avoid potential hazards.
Electrical safety is also crucial. Ensure the electrical connections are secure and the power supply matches the heater’s requirements. Avoid overloading your RV’s electrical system. If you’re not confident in your installation skills, it’s safer to hire a professional. Regular maintenance is key to safe operation, so schedule routine checks.
Maintenance Tips for Your RV’s Tankless Water Heater
Regular maintenance is essential for the longevity and efficiency of your tankless water heater. Descale and clean the unit annually to prevent mineral buildup, especially if you have hard water. Check the filters and clean them regularly to ensure proper water flow. Inspect all connections, both water and gas or electrical, for signs of wear or leaks.
Monitor the performance of your heater. If you notice any changes in water temperature or flow rate, it may indicate a need for maintenance. Refer to the manufacturer’s manual for specific maintenance recommendations. Keeping your heater well-maintained ensures a consistent supply of hot water in your RV.
Troubleshooting Common Issues with RV Tankless Water Heaters
If you encounter issues with your tankless water heater, some common troubleshooting steps can help. If the heater isn’t producing hot water, check the power and gas supply. Ensure all connections are secure and the heater is turned on. If there’s a water flow issue, check the filters and inlet for any blockages.
If the water temperature is inconsistent, check the temperature settings and adjust as needed. Also, ensure the water flow rate is within the heater’s capabilities. For more complex issues, consult the manufacturer’s manual or contact customer support. Regular maintenance and timely troubleshooting can prevent most problems.
FAQs
What is a tankless water heater for an RV, and why should I install one?
A tankless water heater in an RV provides on-demand hot water, saving space and energy compared to traditional tanks.
Can I install a tankless water heater in my RV myself?
Yes, but it’s recommended to hire a professional unless you have experience with plumbing and electrical work.
What are the key factors to consider when choosing a tankless water heater for an RV?
Consider the RV’s size, power source (electric or propane), flow rate, and available space before selecting a unit.
Conclusion
Upgrading to a tankless water heater in your RV can significantly enhance your travel experience. By following the steps outlined above, from choosing the right model to installation and maintenance, you can enjoy endless hot water on your journeys. It’s a change that promises comfort and efficiency, making your RV feel even more like a home on wheels.
Remember, safety and regular maintenance are key to the smooth operation of your tankless water heater. Whether you’re an avid traveler or a seasonal camper, this upgrade is a smart investment. It not only improves the quality of your trips but also adds value to your RV. Embrace this modern solution and make your adventures more enjoyable.


