Removing dried poop from an RV tank is a crucial maintenance task for recreational vehicle owners. Essentially, it involves cleaning out solid waste that has hardened in the RV’s holding tank. This process requires specific steps to ensure the tank is clean and odor-free.
Facing the challenge of a clogged RV tank can be daunting, especially when traditional methods fail. But what if there was a straightforward solution. How to get dried poop out of RV tank? This question might seem overwhelming, yet the answer could simplify your RV maintenance significantly.
Understanding the importance of this task is key. Dried poop in an RV tank can lead to unpleasant odors, reduced tank capacity, and even damage to the tank’s system. Regular maintenance and effective cleaning methods are essential for the health and longevity of your RV’s waste system.
Understanding the Poop Pyramid
Dried waste in an RV tank often forms a ‘poop pyramid.’ This happens when solid waste piles up, usually due to insufficient water use. Understanding this phenomenon is crucial for effective cleaning. It’s a common issue faced by RV owners, particularly during extended trips or in hot climates where waste can dry out quickly.
The poop pyramid can cause clogs and unpleasant odors. Regular maintenance and proper usage techniques can prevent its formation. It’s essential to use enough water during each flush and to regularly empty and clean the tank. Recognizing the signs of a forming pyramid is the first step to maintaining a clean and functional RV tank.
Access the Poop Tank
Accessing the RV poop tank is the first step in the cleaning process. It usually involves locating the tank, which is typically found underneath the RV. The tank should have a clear access point, often labeled or indicated in the RV’s manual. It’s important to wear protective gloves and eyewear during this process.
Ensure the RV is parked on a level surface and that the tank is not overly full. Overfilling can make access more difficult and messy. Familiarize yourself with the tank’s components, such as the valve and hose connections, before proceeding. This knowledge will make the cleaning process smoother and more efficient.
Open/Close the Valve
Valve Operation
| Valve Type | Function | Notes |
| Inlet Valve | Allows water in | Essential for cleaning |
| Outlet Valve | Releases waste | Critical for emptying |
| Safety Valve | Prevents overflows | Check regularly |
Opening and closing the valve is a critical step in maintaining your RV tank. The inlet valve allows water to enter the tank for cleaning purposes. It’s important to open it carefully to avoid any backflow. The outlet valve, on the other hand, is used to release waste from the tank.
Closing the valves properly is just as important as opening them. Ensure that they are securely shut to prevent leaks and odors. Regular checks on the valves’ condition can prevent malfunction. If a valve seems stuck or damaged, it may need replacement or repair to ensure proper functioning.
Add Tank Cleaning Agent
Adding a tank cleaning agent is essential for breaking down waste and preventing odors. Choose a cleaner specifically designed for RV tanks, as regular household cleaners can damage the system. Follow the instructions on the cleaner for the correct amount to use.
Pour the cleaning agent directly into the toilet, leading to the tank. This ensures that the cleaner reaches all areas of the tank. Allow the cleaning agent to sit for the recommended time to break down waste effectively. This step is key in preventing the formation of poop pyramids and maintaining a clean tank.
Add Water Inside the Toilet Seat
After adding the cleaning agent, it’s important to add water inside the toilet seat. This helps distribute the cleaning agent throughout the tank and aids in breaking down waste. The water should be added slowly and carefully to avoid splashing.
Fill the toilet bowl with water and then flush. This process should be repeated several times to ensure the tank is thoroughly flushed with the cleaning solution. The water also helps to soften any dried poop, making it easier to remove during the emptying process.
Close Its Valve
Closing the valve after adding water and cleaning agent is crucial. This step ensures that the cleaning solution remains in the tank for the necessary duration to effectively break down the waste. Make sure the valve is closed tightly to prevent any leakage.
Regular checks on the valve’s condition are important. A faulty valve can lead to leaks, which can cause damage and create unpleasant odors. If you notice any issues with the valve, address them immediately to maintain the efficiency of your RV’s waste system.
Utilize Toilet Rods/Pipes
Using toilet rods or pipes is an effective method to break down layers of dried poop. These tools can physically break up the waste, making it easier to dissolve and flush out. Insert the rod or pipe into the toilet and gently push it into the tank.
Move the rod or pipe in a stirring motion to break up the waste. This process can be messy, so it’s important to wear protective gear. Be careful not to damage the tank’s interior. This method is particularly useful for stubborn waste that has not responded to chemical cleaners.
Break Layers
Breaking layers of dried poop is essential for a thorough clean. After using rods or pipes, check if the layers have sufficiently broken down. This can be done by visually inspecting the tank or feeling for resistance while stirring.
If layers still exist, repeat the process of adding more water and cleaning agent, followed by mechanical agitation. This step may need to be repeated several times for heavily soiled tanks. Patience and persistence are key to effectively removing all layers of waste.
Add Water Through the Passage
Adding water through the passage leading to the tank helps further break down and dilute the waste. This is especially important after mechanical agitation. The added water assists in flushing out the loosened waste material.
Use a hose or a bucket to add water directly to the toilet, ensuring it flows into the tank. The amount of water add should be sufficient to create a good flow, but not so much that it risks overfilling the tank. This step is crucial for ensuring a thorough clean.
Select a Dump Station
Selecting an appropriate dump station is vital for responsibly disposing of RV waste. Look for designated RV dump stations, which are equipped to handle waste disposal. These are often found at campgrounds, RV parks, and some gas stations.
Ensure the dump station is legal and environmentally safe. Improper disposal can lead to environmental damage and legal issues. Plan your route to include stops at dump stations, especially during long trips. This helps maintain your tank and prevents overfilling.
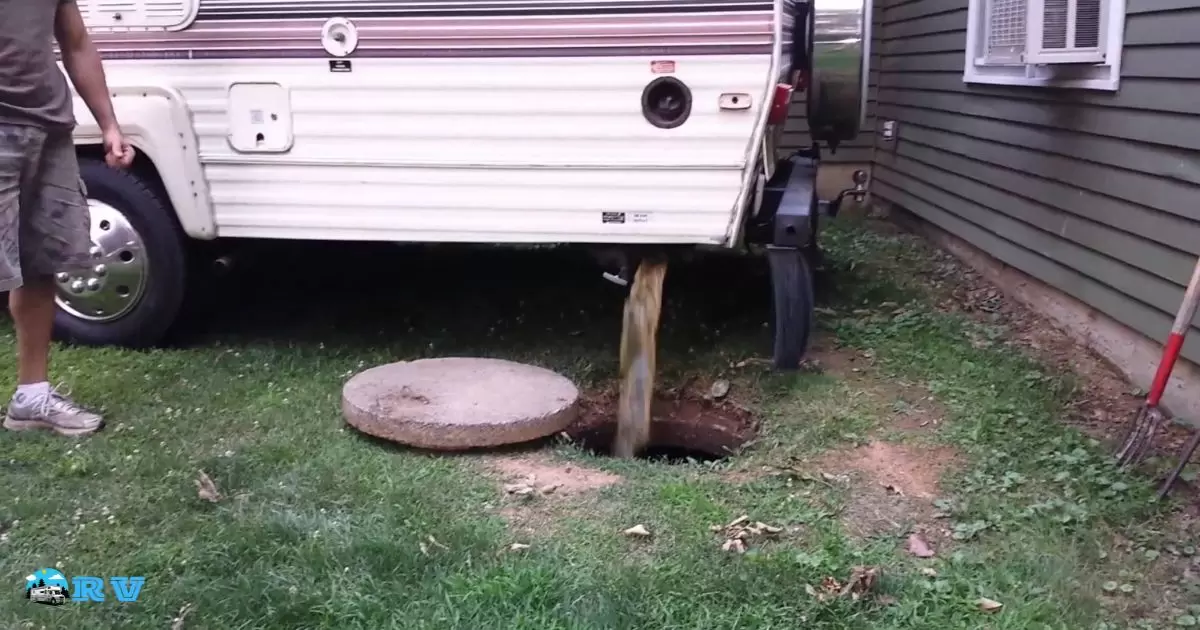
Open Backside Tank Valve
Opening the backside tank valve is the next step in emptying your RV tank. Ensure that your RV is properly positioned at the dump station. The valve should be opened slowly to control the flow of waste. This is important to prevent spills and splashes.
One open, the tank’s contents will flow out into the dump station’s disposal system. Keep the value open until all waste has been releas. This may take several minutes, depending on the size of your tank. Ensure the area around the valve is clean after emptying.
Empty the Poop Tank
Emptying the poop tank is a crucial step in RV maintenance. One the backside valve is open, allow the tank to drain completely. This process can be aided by using water to flush out any remaining waste. Ensure that all waste has been removed for a thorough clean.
After emptying, close the backside valve securely. This prevents leaks and ensures that the tank is ready for the next use. Regular emptying of the tank is important to prevent clogs and maintain a sanitary environment in your RV.
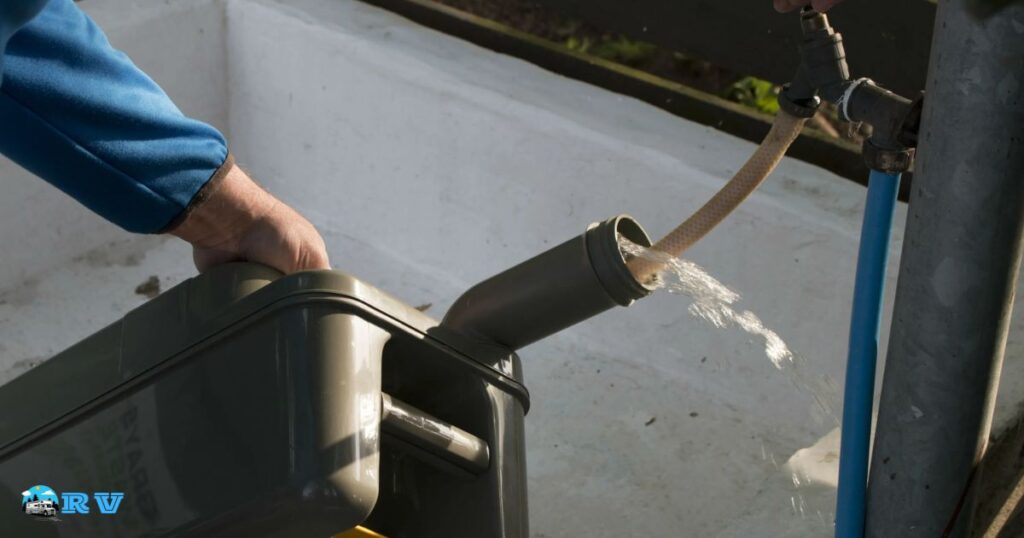
Wash Tank
Washing the RV water tank after emptying is essential for removing any residue, especially if you’ve use bleach in the tank. This can be done by flushing clean water through the tank using a hose or a built-in tank flushing system if your RV is equipped with one.
Ensure that the water reaches all areas of the tank for a thorough clean. This step helps prevent odors and maintains the longevity of your RV’s waste system. Regular washing is an important part of RV maintenance and should not be overlooked.
How to Identify Dried Poop in the RV Tank?
Identifying dried poop in the RV tank is crucial for timely maintenance. Signs include unpleasant odors, slow drainage, and visible waste accumulation. Regular checks can help identify these issues early.
If you suspect dried poop in your tank, take immediate action. The longer it sits, the harder it becomes to remove. Regular maintenance, proper flushing techniques, and frequent emptying can prevent this problem. Stay proactive in your RV tank care to avoid these issues.
FAQs
What’s the Best Way to Dissolve Dried Poop in an RV Tank?
Using a specialized RV tank cleaner or a mixture of water and dish soap can effectively dissolve the waste.
Can I Use Regular Household Cleaners for the RV Tank?
Avoid regular household cleaners; opt for RV-specific products to prevent damage to the tank.
How Long Should the Cleaning Solution Sit in the Tank?
Let the cleaning solution sit for several hours, or overnight if possible, for optimal results.
Conclusion
Keeping your RV tank clean and free of dried poop is crucial for a comfortable and hygienic travel experience. Regular maintenance, such as using the right cleaning agents and methods, helps prevent clogs and odors. Remember, the key is consistency in care. Regular checks, timely emptying, and thorough cleaning after each trip can make a big difference.
Effective RV tank maintenance is not just about tackling problems when they arise, but also about preventing them. Simple habits, like using enough water during flushes and breaking down waste layers, can keep your tank in top condition. With these tips and a bit of regular effort, you’ll ensure a pleasant and worry-free journey in your RV.


