Nothing can ruin a summer campout faster than having your RV’s air conditioner repeatedly overload and trip the circuit breaker in hot weather. Suddenly losing your AC on a scorching day leaves the interior hot, stuffy, and uncomfortable for travelers fast. But before the continual nuisance breaker trips cause damage by overheating electrical systems, it’s critically important for RV owners to troubleshoot and fix the root issue.
Diagnosing why the AC breaker keeps peskily tripping power involves investigating common culprits like underrated breaker capacity for add-ons, worn components drawing high amp loads, improperly sized air conditioners, and more. With strategic adjustments and targeted upgrades to equipment and power sources, intermittent tripping issues can reliably be resolved.
Implementing solutions like hard start kits, air conditioner replacements, 50 amp upgrades, and new breakers prevents future AC disruption. Read on for detail on cost-effective ways RV owners can permanently resolve AC breaker tripping when it hampers off-grid comfort.
Reasons an RV AC Can Trip a Breaker

The air conditioner motor draws a lot of power. It may overload and trip the circuit if used for long periods on very hot days. Old or damaged wiring can also cause the breaker to flip due to increased electrical resistance.
Diagnose The Cause
Before doing anything, you’ll want to try and diagnose why your AC breaker keeps tripping in the first place. Pinpointing the root of the issue will make fixing it much simpler. Here are some of the most common culprits when RV AC breakers trip repeatedly.
Too Many Appliances Running
Your RV may have limited electrical capacity. If you try to run too many appliances at once on the same circuit, it can overload and trip the breaker. The AC requires a heavy power draw, so operating it alongside other gadgets like microwaves, electric kettles, hairdryers etc may be too much for the system.
Electrical Fault
There could be some kind of electrical short or faulty component that is causing excess current flow and making your breaker trip. This may be inside your AC unit itself or somewhere in the wiring that runs from your shore power inlet up to the breaker panel.
Old/Damaged Breaker
If your RV AC breaker is old or has sustained any physical damage, this can sometimes cause it to trip more easily. The breakers are designed to disconnect power in case of overloads, but their tripping mechanism can wear out and become oversensitive over time.
Dirty Air Filter
If your AC air filter gets very clogged with dust, pet hair and other debris, this restricts airflow through the unit. The AC motor has to work much harder to suck air through the restricted filter, drawing more electrical current and potentially tripping your breaker.
Low Voltage
In some older campgrounds with inadequate power supply, you may experience voltage drops. If your RV is getting less than 108 volts on hot summer days when air conditioners are running everywhere, the lower voltage can trip breakers.
Isolate The Problem AC Unit
If you have more than one roof-mounted AC unit on your RV, a good first troubleshooting step is figuring out which one is actually causing the breaker to trip. Here is how to isolate the problematic unit:
- Turn off any fans, dehumidifiers or other devices on the AC circuit besides the actual units themselves.
- Flip the breaker back on and turn on each AC one by one while checking if the breaker trips.
- Take note of which AC unit was the last one running before the breaker disconnected. This is likely the problem appliance drawing too much current.
By isolating the faulty unit, you can then focus your repair efforts in the right place.
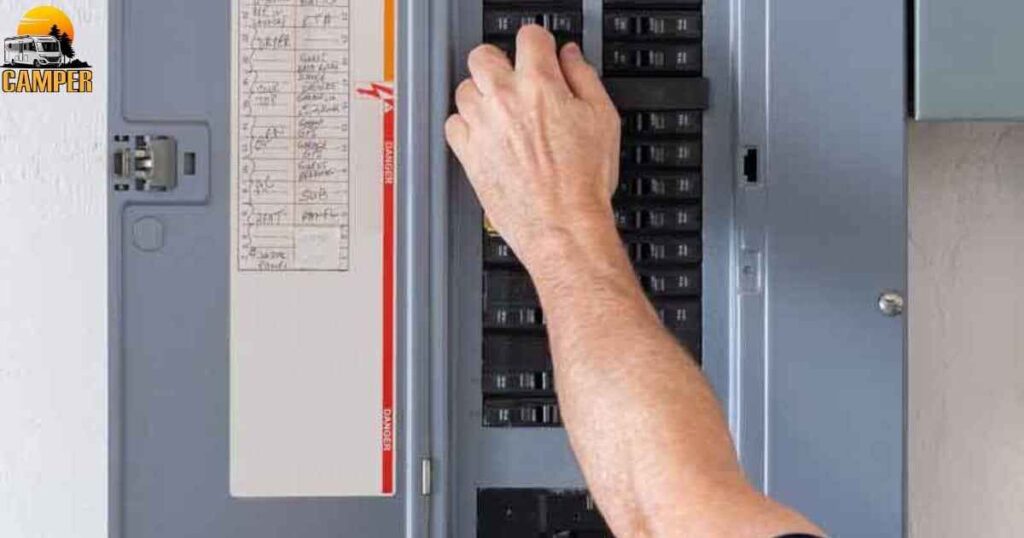
Inspect The Breaker Box
Take a close look inside your RV breaker box at the circuit that’s tripping to try and spot any issues:
- Examine the actual AC breaker switch itself for any loose, corroded or burnt wiring connections. Proper tight and clean contacts are essential for safe power flow.
- Check if any wires on that circuit are discolored or warm to the touch, which can indicate excessive current flow.
- See if the circuit neutral wire lug is loose or dirty, not allowing full electrical flow.
- On multiple breaker boxes, ensure the AC unit is not overloading a small 15-20 amp secondary box that can’t handle a big AC’s power demands.
Repair any questionable connections and ensure your breaker box itself is in good working order before moving on.
Check Your Shore Power Inlet
It’s quite possible for problems at your RV exterior shore power inlet to cause electrical issues. Carefully inspect this inlet outside your RV where you plug into campground power:
- Make sure the outlet cover closes properly and has waterproof integrity to prevent weather corrosion.
- Check for burns or melted spots on the contacts indicating high resistance flow.
- Ensure the contacts are clean and tight, not obstructed by dirt, debris or insulation.
- Confirm the inlet box mounting is secure, with no cracks or gaps allowing moisture intrusion.
- Inspect the shore power cord wire running from the inlet into your RV for cracks, burns or loose plugs.
Repair or replace any damaged inlet parts that could restrict full electrical flow. Using a digital voltmeter to check for voltage drop can help confirm if inlet issues are causing electrical resistance and AC breaker tripping.
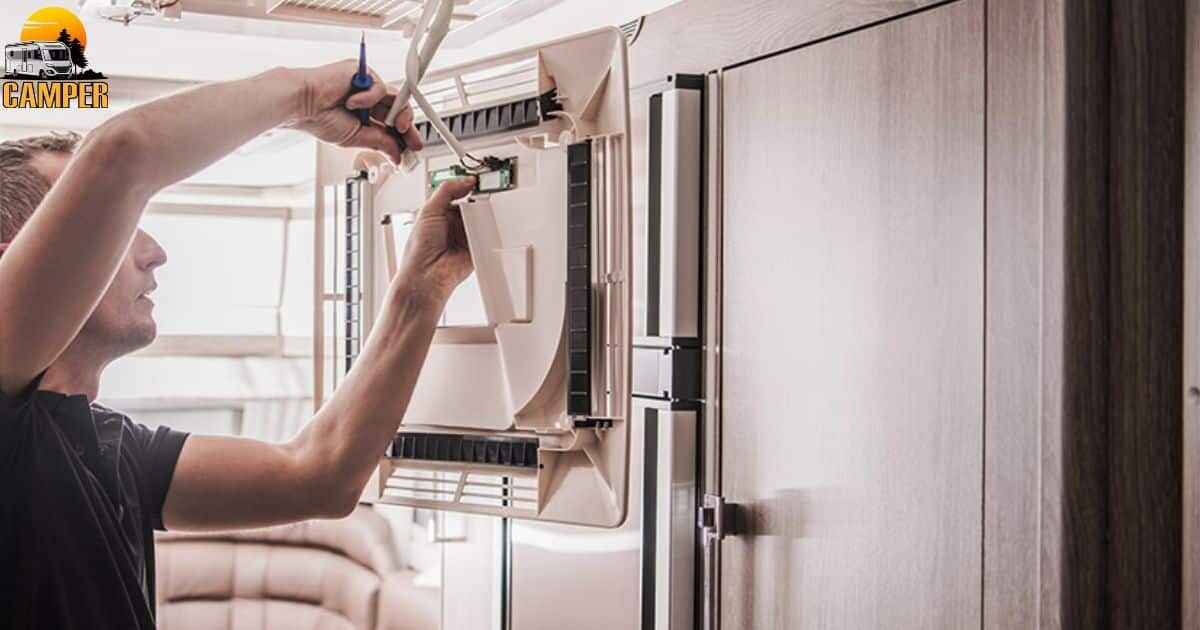
Check Your Air Conditioner
Next, move your troubleshooting focus to examine the actual RV air conditioning unit itself:
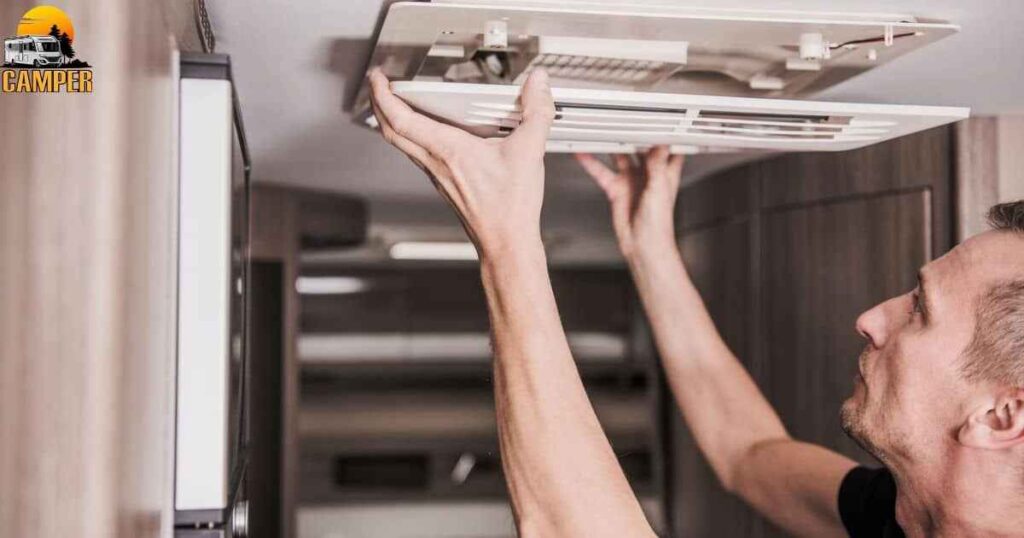
- Remove debris/leaves/nests from the external AC compartment that could obstruct airflow or cause overheating issues.
- Clean the air filter and ensure it’s not excessively blocked. Clogged filters make ACs draw more current.
- Inspect the visible wiring in the AC unit’s electrical compartment for any loose plugs or concerning burn marks. Tighten any loose connections.
- Check that the large AC capacitors are wired securely and show no leaks/damage/bulges. Faulty capacitors can cause tripping.
- Ensure the internal AC coils appear clean, intact and are not obstructed inside their housing. Damaged coils can impede full operation.
- Verify the structural fasteners and external shroud are intact, allowing proper air flow through the condenser unit.
Repairing any AC problems is crucial before blaming the breaker, as an electrical issue in the unit itself could certainly cause excess current draw tripping your circuits.
Test For Faulty Grounding
Proper grounding flow is essential for an RV electrical system to work safely on shore power. If grounding wires are damaged or disconnected, this can definitely cause AC breaker tripping in some cases. Check these items:
- Make sure the ground wire running from your shore inlet connects properly to your breaker panel ground bus bar. Retighten if loose.
- Verify ground wires inside the AC units themselves are attached and functioning properly.
- Check the condition of the grounding wire connecting your breaker panel to the RV frame itself.
- Use a multimeter to check for voltage between neutral and ground wires. Any more than 0.5 volts indicates a ground fault issue.
- Inspect any detachable “pigtail” ground cords plugging into campsite outlets which may have internal wire damage.
Restore any faulty ground connections which could induce excess electrical flow and breaker tripping. Be very careful working around electrical systems and consult an expert if unsure.
Reset Your Air Conditioner

Before assuming your RV air conditioner itself is broken, try fully resetting and reprogramming the unit first:
- Locate the thermostat controlling the problematic AC.
- Unplug the RV from shore power entirely and disconnect the battery to clear any stored electrical charge.
- Let the AC sit powerless for 15-30 minutes to completely reset the system.
- Reconnect to shore power and battery, then try running your air conditioner to see if the breaker holds.
Sometimes resetting everything allows any electrical control boards or capacitors to discharge stray currents which may have been causing issues. This simple reboot can fix AC tripping problems before attempting further repairs.
Upgrade To A Hard Start Kit
If your RV air conditioner compressor motor is aging and having difficulty starting up, installing a “hard start kit” can help it run more efficiently and prevent breaker tripping. This add-on device stores temporary energy in a capacitor which gives your AC motor an extra surge of turning torque needed to start against system resistance. Hard start kits are an easy plug-and-play upgrade – just make sure to get the properly rated kit for the BTU size of your existing AC unit.
Check Your Campsite Power
Keep in mind that some tripping issues arise from external power sources with inadequate voltage, low amps, or faulty campsite electrical gear.
Carefully check these items before blaming your air conditioner:
- Use a digital voltmeter to check the voltage from the campsite electrical pedestal at your inlet. It should read 115-125 volts. Lower voltage can strain ACs.
- Inspect the campground’s breaker box feeding your pedestal to check for problems distributing full amp loads. See if other outlets are tripping too.
- Plug your RV into a different nearby campsite outlet if available to see if the breaker holds.
- Check your shore power cords and adapters for voltage drops before power enters your RV.
If multiple campsites have low voltage or the entire campground circuit is overloaded, this external issue must be resolved by park maintenance staff before anything inside your RV can operate properly without tripping.
Replace The Breaker
If you’ve thoroughly checked all the other possible reasons behind an AC tripping breaker to no avail, it may simply be time to replace the faulty breaker itself. Breakers do wear out over time.
Installing a new breaker matched exactly to your RV air conditioner’s voltage and amperage needs can restore full electrical protection.
Just be certain to get the same style breaker (single vs double pole) and ensure your RV panel can fit the replacement properly. Use care when working inside live breaker boxes and consider having an professional electrician handle any wiring work.
Hopefully by narrowing down the electrical fault, you can get your RV air conditioner running happily again without those annoying tripped circuit breaker cutoffs! Be sure to keep monitoring performance even after fixes to ensure the problem was fully resolved. Enjoy the cool air!
What to Do First to Stop My AC From Tripping the Breaker?
If your breaker trips because of the air conditioner, follow these steps:
- Turn off the air conditioner for 30 minutes.
- Turn the AC circuit breaker back on in your electrical panel.
- After 30 minutes, set the AC to cool.
After doing this, your breaker might stop tripping. If it trips again after a few hours, you should check for the main cause.
How to Fix an AC Tripping Breaker Immediately?
Now you understand why your air conditioner trips the circuit breaker. Here are the steps to fix it:
- Find out why the circuit breaker is tripping.
- Check if the air conditioner is the only thing plugged into the power source. If not, unplug other appliances.
- Look at the AC and breaker cables. Check for frayed wires. If you see any, replace them if you can. If you can’t, call an electrician.
- Check if the air conditioner compressor is overloaded or damaged. If it is, call a qualified electrician.
- If you’ve tried everything above and it’s still not working, hire a qualified electrician to diagnose and fix the problem.
Dometic AC Tripping the Breaker
A Dometic air conditioner tripping the breaker is a common issue for RV owners. This occurs when the air conditioning unit attempts to pull more amps than the circuit breaker is rated for, causing the breaker to trip to prevent electrical damage.
Some potential fixes include checking the breaker itself to ensure it is in good working order and rated for the proper amperage load. Additionally, check that the AC unit is adequately sized for the RV – an undersized AC will struggle to cool on hot days, drawing extra amps in the process.
Addressing worn fan motors or compressors in older units may alleviate excess current draw. Consider installing a soft start kit to limit amp spikes during startup. With proper troubleshooting and potential component upgrades, resolving Dometic AC tripping problems is achievable.
If you’re looking to enhance your RV experience, it’s essential to consider the foundation. Building an RV pad not only provides a stable and level surface for your vehicle but also adds convenience and utility. Explore the benefits of constructing a dedicated RV pad to ensure a secure and comfortable space for your adventures.
RV AC Tripping the Breaker on Hot days
It can be frustrating when your RV’s air conditioner keeps tripping the circuit breaker on extremely hot summer days. The AC struggles to keep up and pulls more amps than the breaker can handle. Here are some tips to prevent continual breaker tripping:
- Replace fan motors and compressors if original components are worn. Old parts may draw excess current.
- Ensure the AC unit is properly sized for your RV. An undersized AC will overwork on hot days.
- Install a soft start kit to limit amp spike at start-up.
- Upgrade to a 50 amp circuit if currently running on 30 amps. This gives the AC more overhead.
- Close windows and extra vents on hot days to reduce cooling burden.
- Keep filters clean for maximum airflow and efficiency.
Following one or more of these fixes can allow your AC to run on even the hottest summer day without those pesky circuit breaker trips.
RV AC Tripping a 30 amp Breaker
It can be very frustrating when your RV’s air conditioner keeps overwhelming the 30 amp circuit and tripping the breaker. A couple upgrades and strategic tweaks can help prevent continual nuisance breaker trips on a 30 amp hookup:
- Install a hard start or soft start kit on the air conditioner to limit the initial startup surge that can trip breakers.
- Switch out the AC unit to a more efficient and lower amperage model if yours is outdated. Newer units put less strain on 30 amp circuits.
- Make sure your 30 amp circuit breaker is in good working order, not worn out. Replace if needed.
- Close windows and extra vents on hot days to reduce cooling workload.
- Park in shade when possible to lower air conditioner burden.
- Consider installing 50 amp service if functionality is limited on 30 amps.
With a few adjustments, you can avoid frustration and keep cool on 30 amps.
The Cost of Replacing an RV Circuit Breaker
Replacing a worn-out or faulty circuit breaker in an RV can range from $30 to $350, depending on the amperage, type of breaker, and whether additional wiring needs replacement. A standard 30 amp main breaker replacement kit costs $35-60. Upgrading from a 30 amp to a 50 amp breaker can run $120-200, including wiring upgrades.
Individual smaller 15/20 amp GFCI and 12 volt DC breakers range $10-60 each. On the higher end, a full panel replacement or installation of surge protective breakers can be $300+. With the proper tools, RV owners can replace most breakers, but complicated jobs are best left to certified electricians and can impact total replacement costs.
Frequently Asked Questions
How do I stop my AC from tripping the breaker?
Inspect the AC unit and wiring for issues, clean dust/debris, and upgrade wiring if needed.
Why does my RV breaker keep tripping?
Old or damaged wiring, a faulty AC unit motor, or an overloaded circuit could be causing it.
How do you fix an AC breaker?
Check for wiring/connection issues and replace the breaker if faulty or old. An electrician can test and diagnose problems.
How do you reset an RV air conditioner?
Flip the breaker switch back to the on position after checking for issues making it trip in the first place. Wait a few minutes before turning the AC back on.
Conclusion
Having your RV air conditioner continually trip its circuit breaker can be incredibly disruptive on a camping trip. Before the problem causes serious electrical damage, it’s important to diagnose why the breaker keeps nuisancing tripping.
Common causes include worn AC components drawing extra amps, undersized AC units struggling on hot days, faulty breakers, and inadequate circuit capacity. Targeted upgrades like installing hard start kits, replacing the AC unit with a more efficient model, switching to 50 amp service, and replacing weak breakers can provide reliable fixes.
While AC breaker issues can be frustrating, identifying the root cause and implementing strategic troubleshooting allows RV owners to resolve the problem for good. With the right targeted upgrades to equipment and circuit capacity, you can prevent future AC-related breaker trips and enjoy reliable cooling, even on the hottest summer camping adventure.


