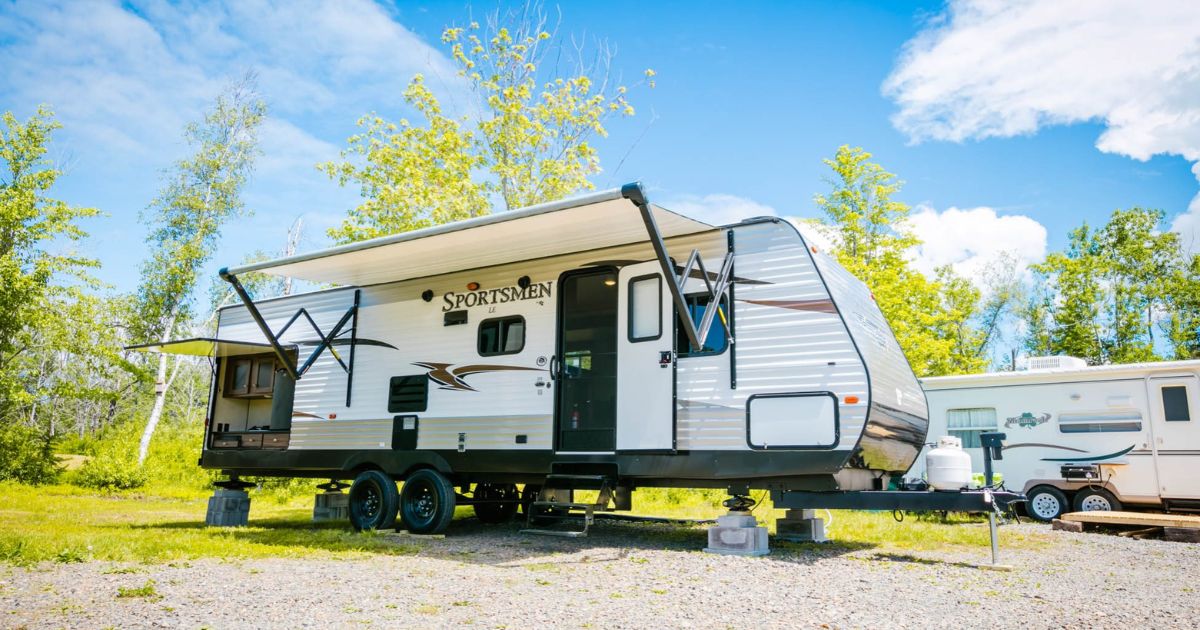
As the chill of winter fades and the promise of spring emerges, RV owners across the UK, USA, and Canada begin to think about hitting the open road. Dewinterizing your RV is a crucial step to ensure your vehicle is safe, functional, and ready for adventure.
This comprehensive guide will walk you through each step of the dewinterization process, from inspecting your RV to planning your first trip of the season.
STEP 1: INSPECT THE RV
Before you embark on the actual dewinterizing tasks, a thorough inspection of your RV is essential. This initial step helps you identify any potential issues that could have arisen during the winter months.
Start by examining the exterior of your RV for any visible signs of damage such as cracks in the windows or roof, which could have been caused by heavy snow or ice. Don’t overlook the undercarriage and the seals around doors and windows.
- Roof and Body Inspection: Check for any leaks or water damage evident on the roof and body panels.
- Window and Door Seals: Ensure all seals are intact to prevent water ingress.
- Tire Condition: Look for cracks and check tread depth, as tires can degrade when not in use.
STEP 2: FLUSH THE WATER SYSTEM
Flushing the water system is one of the most critical steps in the dewinterization process. During the winter, non-toxic antifreeze is added to the plumbing to prevent pipes from freezing. Now, it’s time to remove this antifreeze thoroughly.
- Connect your RV to a potable water source using a hose.
- Open all faucets (including showers and sinks) and flush the toilet several times.
- Run water through the system until it runs clear, indicating that all antifreeze has been removed.
Pro Tip: Always use a water filter when connecting your RV to a new water source to avoid contaminants.
WATER FILTERS AND WATER HEATER
After flushing the system, focus on the water heater and filters. If your water heater was in bypass mode during the winter, now is the time to revert this setting.
- Reactivating the Water Heater: Switch off the bypass mode and allow the water heater tank to fill up completely.
- Replacing Filters: Replace any water filters removed for winter storage to ensure clean, safe drinking water.
Ensure that all connections are secure and leak-free before proceeding.
Read More: How Much Water Does An RV Toilet Use Per Flush?
STEP 3: SANITIZE THE WATER SYSTEM
Sanitizing the water system is crucial for ensuring that your water supply is safe for use. Here’s how to effectively sanitize the system:
- Mix a quarter cup of bleach with one gallon of water for every 15 gallons your freshwater tank holds.
- Pour this solution into the freshwater tank and fill it up with potable water.
- Run this solution through all water lines by opening faucets and flushing toilets.
- Let it sit for several hours, then drain the system and refill it with fresh water.
Remember: Always ensure the system is thoroughly flushed to remove all traces of bleach before use.
STEP 4: DRAIN AND FILL HOT WATER HEATER TANK
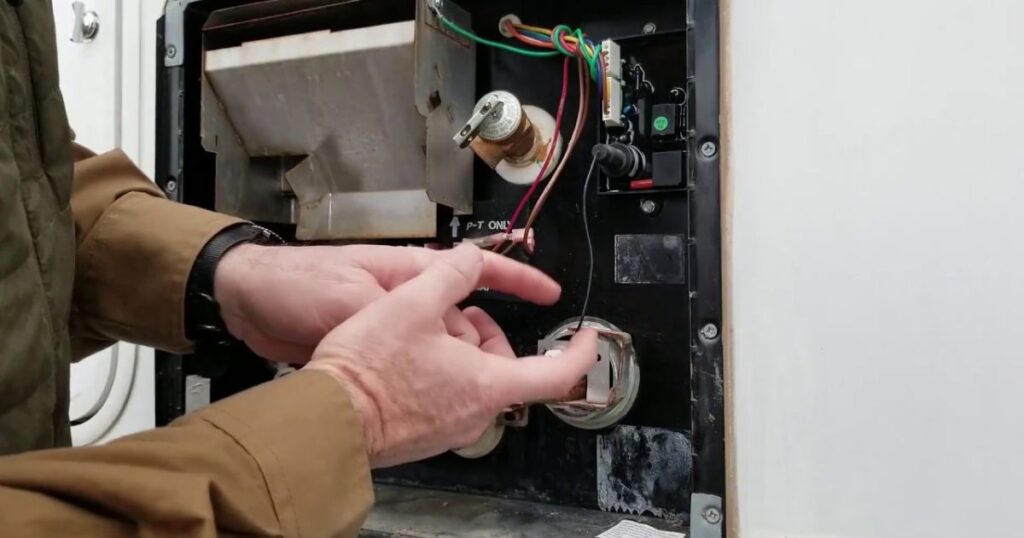
If your water heater wasn’t set to bypass mode for winter, you’ll have to drain and refill it before use or replacing any water filter cartridges.
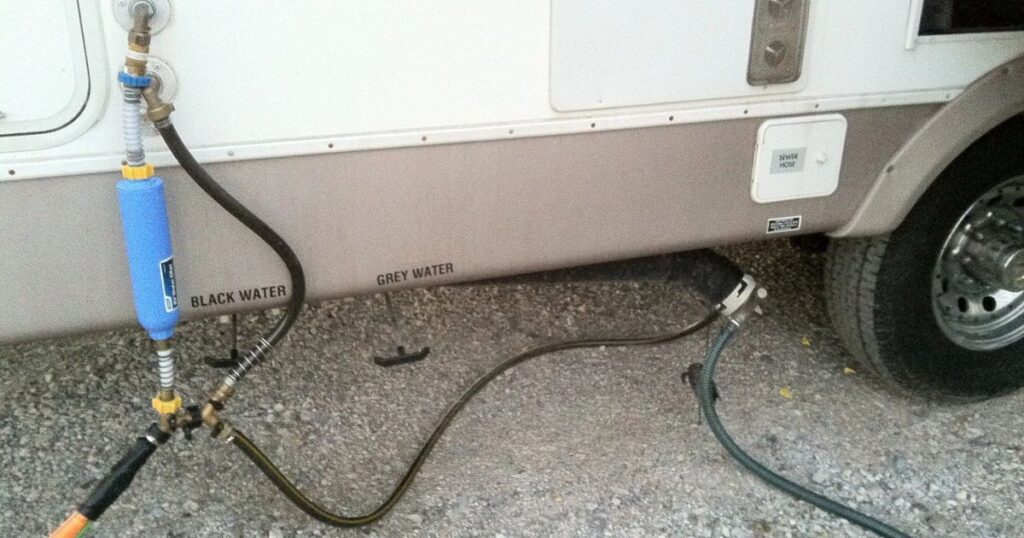
To drain the hot water tank, ensure the unit and incoming water supply are turned off. Open the pressure relief valve and gradually remove the drain plug, using a container to catch the antifreeze. Properly dispose of the antifreeze, possibly by adding it to grey or black water tanks for later disposal.
Once the tank is empty, close the valve, reinstall the drain plug, and switch on the water supply (and water pump if applicable) to refill the tank with freshwater. It’s advisable to wait until you’ve finished sanitizing your water supply before turning on the water heater. Ensure the tank is completely filled before switching the unit on to prevent damage.
CHECK THE ANODE ROD
The anode rod is a crucial component that helps prevent corrosion in your water heater tank.
- Inspect the Anode Rod: Look for excessive corrosion or deterioration, which indicates it’s time for a replacement.
STEP 5: TEST THE WATER SYSTEM
After all the cleaning and flushing, it’s vital to test the water system to ensure everything works correctly.
- Leak Testing: Check all pipes and connections for leaks.
- Flow Test: Turn on all faucets and showers to verify water pressure and hot water availability.
STEP 6: CHECK THE PROPANE SYSTEM
The propane system powers many of the appliances inside your RV, so it must be in top working order.
- Inspect for Leaks: Use a soapy water solution on all connections and look for bubbles that indicate a leak.
- Test Appliances: Light the stove and oven to ensure they are working properly.
STEP 7: CHECK THE BATTERY
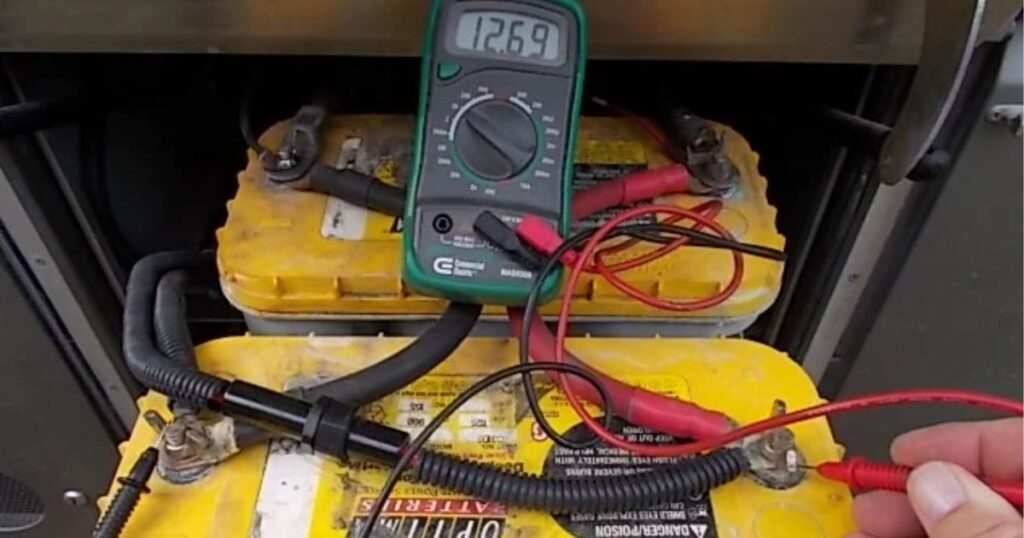
Before utilizing the RV, it’s crucial to assess the battery’s condition, especially during the harsh winter season when it’s prone to strain. Examine the battery thoroughly for signs of damage, leaks, or corrosion. Verify its functionality by activating lights, radio, and other electrical components.
If the battery demonstrates weakness or fails to retain charge effectively, it’s advisable to replace it promptly. Bringing batteries indoors for storage reduces the likelihood of encountering issues. While inspecting the battery, it’s opportune to also check fluid levels such as coolant, brake fluid, and power steering fluid under the hood.
STEP 8: CHECK THE TIRES
After sitting stationary for months, it’s vital to check the condition of your RV’s tires before hitting the road. Tires can lose pressure and develop flat spots when not in use for extended periods.
- Tire Pressure: Check and adjust the pressure according to the manufacturer’s specifications. This is crucial not only for vehicle performance but also for safety.
- Inspect for Damage: Look for signs of wear, cracks, or other damage. Replace tires that show significant deterioration to avoid blowouts while traveling.
STEP 9: CLEAN THE RV
A thorough cleaning of your RV is not just about aesthetics; it’s also about functionality and maintenance. Dirt and debris can cause damage over time, so it’s important to clean both the interior and exterior of your RV thoroughly.
- Exterior Washing: Wash the exterior of your RV with appropriate cleaners to remove any buildup from storage.
- Interior Cleaning: Vacuum and wipe down all surfaces. Check for mold or mildew, especially if the RV has been stored in a damp location.
STEP 10: CHECK THE APPLIANCES

Before you head out, ensure that all the appliances in your RV are operational. This includes the refrigerator, stove, microwave, air conditioning, and heating systems.
- Operational Test: Turn on each appliance to ensure they function correctly.
- Clean Filters: Check and clean or replace all appliance filters to improve efficiency and prevent issues down the road.
STEP 11: PLAN YOUR TRIP
Now that your RV is dewinterized and everything is in order, it’s time to plan your adventures.
- Destination Research: Look into various destinations and consider factors like weather, restrictions, and RV amenities.
- Route Planning: Plan your route, considering the best roads for RV travel and locations of RV camps or services along the way.
IS YOUR DEWINTERIZING COMPLETE?
To wrap up your dewinterization process, go through a final checklist:
- Have all systems been checked and tested?
- Are there any unresolved issues that need attention?
- Is your RV fully stocked with all necessary supplies and equipment?
Once you’ve confidently addressed these questions, your RV is truly ready for the road.
Conclusion
Dewinterizing your RV is an essential process that prepares your vehicle for safe and enjoyable travels. By following these detailed steps, you ensure that every component of your RV functions optimally, from the plumbing and electrical systems to tires and appliances. Remember, the key to a hassle-free season on the road starts with thorough preparation. Happy travels!


