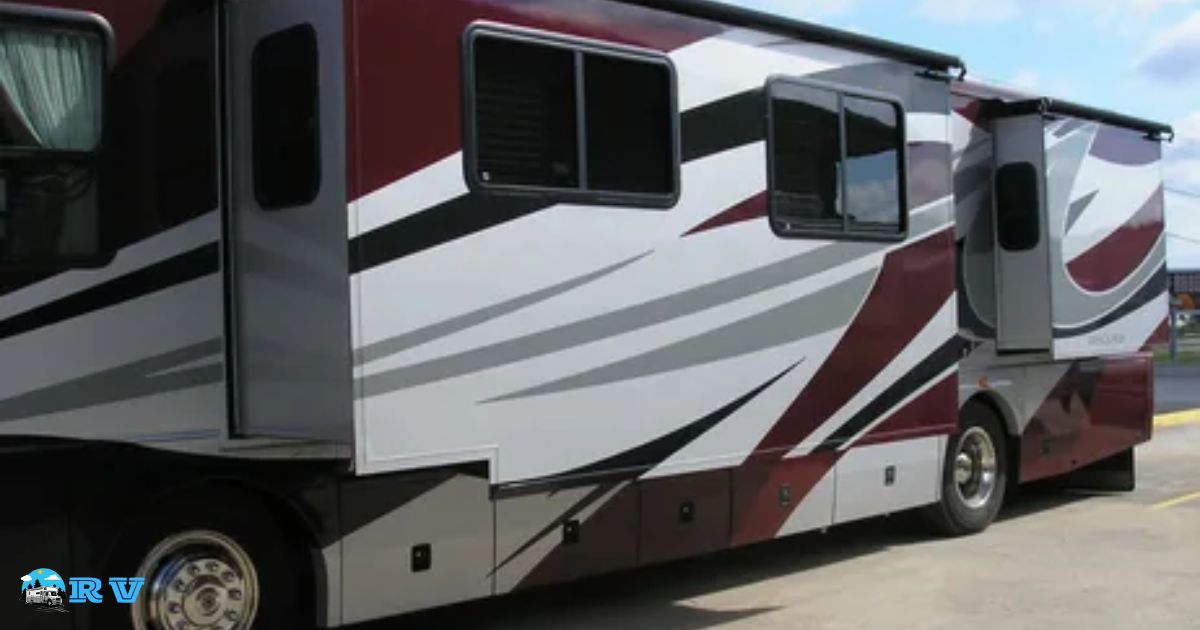
RV slide outs are extensions built into recreational vehicles (RVs) that expand living space when parked. RV slide out 101 refers to the basic understanding and techniques required to construct these slide outs.
Ever wondered, how to build an RV slide out 101? Discovering the intricacies of constructing these expandable compartments opens a world of possibilities for customizing your RV. From understanding the mechanisms to selecting the right materials, diving into RV slide-out construction offers a fascinating journey of creation and customization.
RV slide out 101 delves into the foundational aspects of constructing slide outs for RVs. This includes exploring different types of slide outs. Understanding their mechanics, materials needed for construction, and the basic steps involved in building.
What Is RV Slide-out?
An RV slide-out is an expandable compartment built into recreational vehicles to create additional space when parked. It functions by extending a section of the RV’s interior, often the living area, outward, providing more room for occupants.
These slide-outs can come in various types, such as room extensions for dining areas, bedrooms, or even entire sections of the RV. They’re designed to retract back into the main structure while on the move and expand outwards when stationary, maximizing living space inside the vehicle.
How To Build An RV Slide Out 101 By Following Few Secure Means
Building an RV slide-out securely requires attention to detail. Start by measuring the space accurately and gathering the right materials for the job. Then, follow the manufacturer’s instructions meticulously to ensure a safe and secure installation that enhances your RV’s functionality.
When constructing an RV slide-out, prioritize safety at every step. Double-check measurements, use sturdy materials, and follow a step-by-step guide for assembly. Taking your time and being thorough ensures a reliable and secure slide-out that adds convenience to your travels.
Installation Of Polyurethane Silicone Border
Installing a polyurethane silicone border is crucial when creating an RV slide-out. Begin by cleaning the area thoroughly and ensuring it’s dry before applying the border. Measure accurately and cut the border to fit the slide-out’s dimensions, then carefully adhere it using a suitable adhesive.
For an RV slide-out 101 project, start by prepping the slide-out’s edges by removing any debris or old sealant. Apply a bead of polyurethane silicone along the edges, ensuring a continuous and uniform seal to prevent leaks. Smooth out the silicone for a clean finish and let it cure completely before testing the slide-out.
Requirement Of Long Headers For Installing Bundle Blades

To install bundle blades, having long headers is crucial. These headers provide the necessary support and stability for the blades within the RV’s structure. They ensure proper alignment and distribution of weight, ensuring the smooth extension and retraction of the slide outs.
Long headers play a vital role in securing bundle blades for RV slide outs. They aid in maintaining structural integrity, preventing sagging or misalignment issues that could arise during the operation of the slide outs. Properly installed headers are essential for a durable and functional RV slide out system.
Instruments Will Go Straight To The Battery Box
When building an RV slide-out, make sure to route the wires from the instruments directly to the battery box. This ensures a direct and efficient power supply for your instruments, reducing the chances of power loss or interference along the way.
Securing the instruments’ power source straight to the battery box minimizes potential issues with electrical connectivity. It’s a straightforward approach that ensures a reliable and consistent power flow, keeping your instruments functioning smoothly while on the road.
The Building Of Own Devised Circuit
Building your own devised circuit for an RV slide-out involves planning the design, selecting the necessary components, and assembling them systematically. Understanding the electrical requirements and mechanisms is crucial before sketching out your circuit diagram.
Once the blueprint is ready, gather resistors, capacitors, and other essential parts before carefully soldering and connecting them according to the circuit plan. Careful testing and troubleshooting are crucial when building your devised circuit for an RV slide-out.
Before installing the circuit, ensure each component functions as intended to prevent electrical issues later. Test the connections, verify the flow of current, and address any discrepancies promptly. A thorough check ensures a properly functioning circuit, enhancing the reliability and safety of your RV slide-out mechanism.
Screwing And Gluing For Additional Back-up
Screwing and gluing add extra support to your RV slide out. By screwing parts together, you ensure a sturdy framework that can handle movement. Gluing reinforces these connections, preventing loosening over time and enhancing the overall durability of your slide out.
When building an RV slide out, using screws provides mechanical strength. It secures components firmly, minimizing potential shifting or wobbling during travel. Additionally, applying glue creates an added layer of cohesion, strengthening the joints and contributing to a more robust structure for your slide out.
The Setting Of The Powerhouse At The Head Of The Sheets
The powerhouse sits at the head of the sheets, driving the movement of an RV’s slide-out. It’s the central force, usually a motor, responsible for extending and retracting the slide-out smoothly.
In RV slide-out construction, understanding the powerhouse’s location at the head of the sheets is crucial. It’s positioned strategically to initiate the movement of the slide-out mechanism, ensuring proper extension and retraction of the compartment.
Cutting Off The Leading Edge
The powerhouse is like the command center at the front of the sheets. It’s where the magic happens, controlling the movement of the RV slide out. Think of it as the engine, responsible for extending and retracting the slide with precision.
At the head of the sheets sits the powerhouse, the core of the slide-out mechanism. This crucial component orchestrates the smooth extension and retraction of the slide, ensuring it moves seamlessly in and out of the RV. When considering whether to leave your RV slides in or out, it’s important to understand how this powerhouse functions in both configurations.
Buying Tips For Building The RV Slide-out
When purchasing materials, prioritize quality over price for a sturdy slide-out. Look for durable mechanisms like heavy-duty rails and reliable motors to ensure longevity and smooth operation.
Consider the space available in your RV and choose a slide-out size that fits comfortably without compromising the interior layout. Consult experts or online forums for recommendations on reputable suppliers and best practices in acquiring materials for your RV slide-out project.
FAQs
What tools are essential for building an RV slide-out?
You’ll need basic carpentry tools like saws, drills, and screwdrivers, along with specialized items such as a slide-out adjustment wrench and sealant applicators.
How much time does it take to build an RV slide-out?
The timeframe can vary, but a simple DIY project might take around 20-30 hours, while complex builds or custom designs may require longer.
Can I install a slide-out in any RV?
Not necessarily. It depends on the RV’s structure and available space. Some RVs may not be designed to accommodate slide-outs.
Conclusion
Mastering the basics of RV slide-out construction opens doors to endless possibilities for personalizing your mobile home. With fundamental knowledge about mechanisms, materials, and installation steps, you’re equipped to embark on this DIY journey confidently.
Building an RV slide-out is not just about expanding space; it’s about creating a unique, functional extension tailored to your needs, adding both value and character to your vehicle. So, armed with these foundational skills, go forth and craft your personalized RV slide-out, transforming your mobile living experience in ways only limited by your imagination.


