Imagine your RV water lines as delicate veins, vulnerable to the freezing temperatures of winter. To ensure their longevity, it is crucial to properly blow out these water lines. In this expert guide, we will walk you through the necessary steps, precautions, and tips to effectively protect your RV’s plumbing system. From assembling the air compressor to flushing the lines, we have you covered. Join us as we delve into the essential knowledge every RV owner should possess.
Key Takeaways
- Close all faucets and drains to prevent water leakage
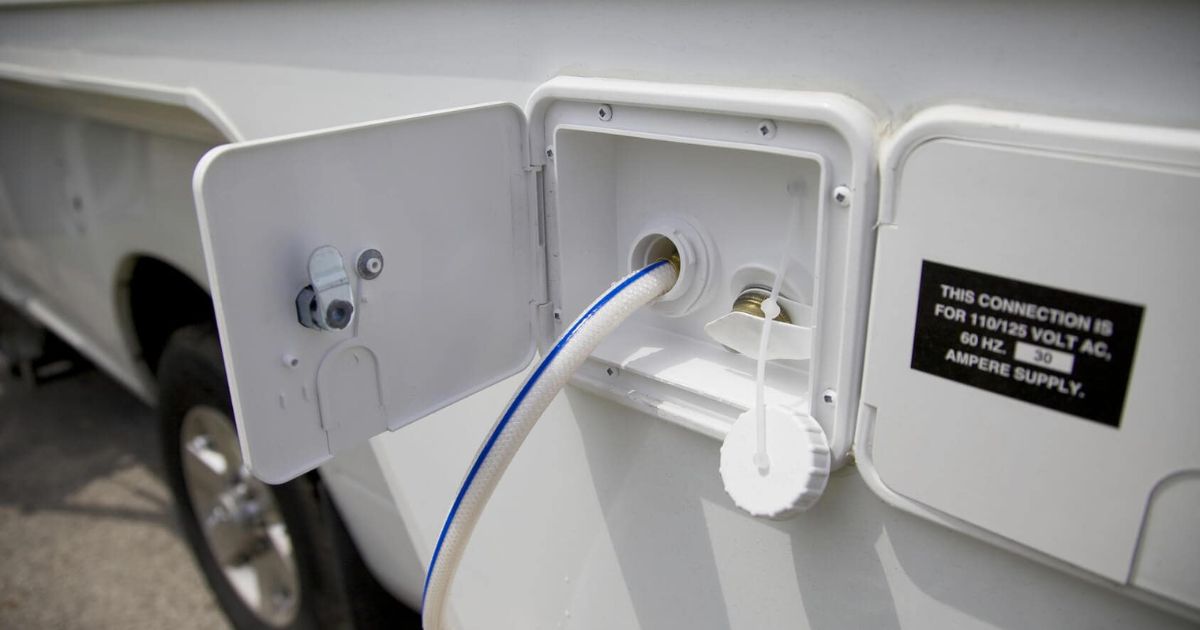
- Connect the blowout plug to the city water inlet and attach the air compressor hose
- Use an air compressor with a pressure regulator and set it to 30-40 psi
- Open each faucet one at a time and let the water flow until it runs clear
Steps to Blow Out Water Lines in RV
The process of blowing out water lines in an RV involves several essential steps. To begin, ensure that all faucets and drains are closed to prevent any water leakage during the process. Next, locate the water pump and turn it off to stop the flow of water through the system. Then, open all the faucets, including the showerhead and toilet, to release any remaining water.
Once the faucets are open, connect the blowout plug to the city water inlet and attach the air compressor hose to the plug. Slowly increase the air pressure to around 30-40 PSI, using the recommended PSI to Blow Out RV Water Lines, and allow the compressed air to blow out the water from the lines. Finally, close all the faucets and move on to the next step of assembling the air compressor.
Assembling the Air Compressor
To properly assemble the air compressor, it is important to carefully follow the manufacturer’s instructions and ensure all necessary components are securely connected. Start by locating the air intake filter and attaching it to the compressor. This filter helps to prevent dust and debris from entering the system, ensuring clean and efficient operation. Next, connect the air hose to the compressor’s outlet valve, making sure it is tightly secured.
Check for any leaks or loose connections before proceeding. Once the air compressor is assembled, you can move on to the next step of flushing the water lines. This process will ensure that all water is removed from the RV’s plumbing system, preventing any potential damage from freezing temperatures.
Flushing the Water Lines
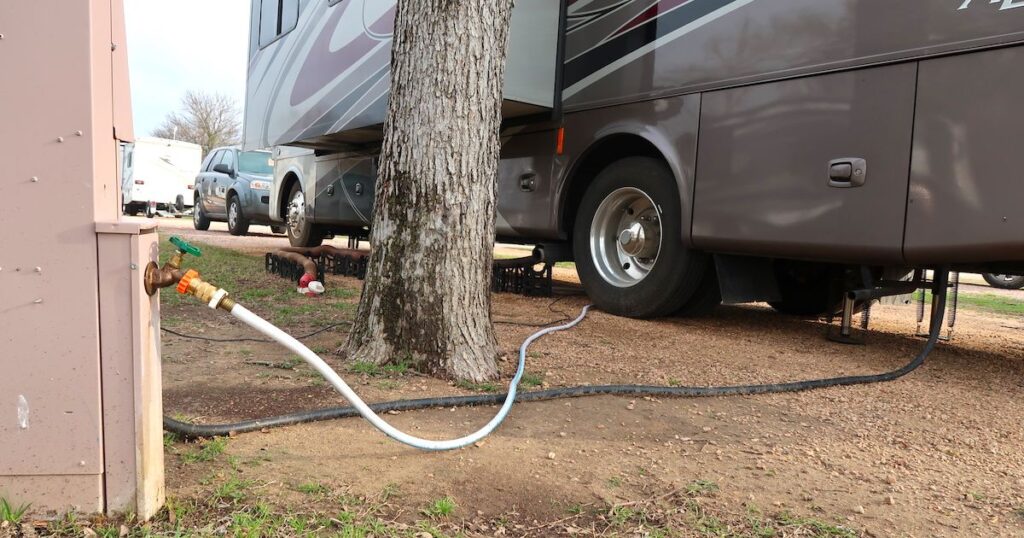
To effectively flush the water lines in an RV, begin by properly preparing the plumbing system. Flushing the water lines is an essential step in maintaining a clean and healthy water supply in your RV. It helps remove any accumulated sediments, bacteria, or other contaminants that may have built up over time. To start, close all faucets and drains in your RV. Then, connect a freshwater hose to the city water inlet and turn on the water supply.
Open each faucet, one at a time, starting with the faucet closest to the water source, and let the water flow for a few minutes. This will help flush out any debris or contaminants from the lines. Repeat this process for each faucet and toilet in your RV until the water runs clear. By following these steps, you can ensure that your water lines are thoroughly flushed and ready for use in your RV adventures.
Expert Q&A on RV Water Line Blowing
In the realm of RV water line blowing, it is imperative to gain insights from experts through a series of questions and answers. This Q&A session with RV water line blowing experts will provide valuable information and guidance for those looking to properly blow out their RV water lines. Below is a table summarizing the questions asked and the corresponding expert answers:
| Question | Expert Answer |
|---|---|
| How much air pressure should be used to blow out the water lines? | It is recommended to use an air compressor with a pressure regulator set to 30-40 psi. |
| Is it necessary to open all the faucets and valves during the blowing-out process? | The process typically takes around 10-15 minutes, but it may vary depending on the size of the RV and the length of the water lines. |
| Is it necessary to open all the faucets and valves during the blowing out process? | Yes, it is crucial to open all faucets and valves, including showerheads and outdoor faucets, to ensure all water is removed from the lines. |
Tips for Blowing Out RV Water Lines
RV owners can ensure a successful winterization process by following these helpful tips for blowing out their water lines. Firstly, it is important to disconnect the RV from a water source and drain all water tanks and lines. Next, open all faucets, including outdoor showers and toilets, to allow for proper drainage. Once the water is drained, use an air compressor with a pressure regulator to blow out the remaining water from the lines.
Start with the faucet closest to the water pump and work your way toward the farthest faucet. It is crucial to blow out each line individually, ensuring that all water is removed. Finally, close all faucets and reattach any disconnected lines. By following these tips, RV owners can effectively protect their water lines from freezing during the winter months.
Warnings and Precautions to Consider
It is important to take proper precautions and heed warnings when blowing out water lines in an RV. By following these measures, you can ensure the safety of yourself and your RV. Firstly, always wear appropriate protective gear, such as gloves and safety goggles, to prevent any potential injuries.
Secondly, before starting the process, make sure to disconnect all electrical power sources to avoid any accidents or damage. Additionally, be cautious while working with compressed air as it can be dangerous if mishandled. It is crucial to release air pressure slowly and gradually to prevent any sudden bursts or damage to the water lines.
Lastly, be aware of any potential leaks or weak spots in the water lines and take the necessary steps to address them before blowing out the lines. By adhering to these warnings and precautions, you can successfully blow out water lines in your RV while ensuring a safe and reliable experience.
Necessary Items for Blowing Out Water Lines
To properly blow out water lines in an RV, you will need several essential items. These items are necessary to ensure that the process is done effectively and efficiently. First and foremost, you will need an air compressor with enough power to generate at least 30 pounds per square inch (PSI) of pressure.
This will provide the necessary force to clear out any remaining water in the lines. Additionally, you will need a blowout plug that can be connected to the RV’s water inlet. This plug acts as a connection point for the air compressor and allows the pressurized air to flow through the water lines.
Lastly, it is crucial to have an appropriate length of air hose to connect the compressor to the blowout plug. This will allow for flexibility and ease of use during the process. By having these necessary items, you can effectively blow out the water lines in your RV and ensure that they remain in good condition.
References for Further Information on RV Winterization
For those seeking more in-depth information on RV winterization, there are several reputable sources available. These sources provide comprehensive guides that cover all aspects of winterizing an RV, ensuring that owners have the necessary knowledge and tools to protect their investment during the colder months. One such source is the official website of the Recreational Vehicle Industry Association (RVIA).
They offer a wealth of resources, including step-by-step instructions, checklists, and videos that guide RV owners through the winterization process. Another reliable source is RV forums and online communities, where experienced RV enthusiasts share their insights and experiences. These forums are a great platform for asking questions, seeking advice, and learning from the experiences of fellow RV owners.
Additionally, there are numerous books and publications dedicated to RV maintenance and winterization that can provide detailed information and guidance. By utilizing these reputable sources, RV owners can ensure a thorough and effective winterization process, giving them peace of mind and preserving the longevity of their RV.
Reasons Why You Should Know How to Blow Out RV Water Lines
Knowing how to blow out RV water lines is essential for maintaining the integrity and functionality of your RV’s plumbing system during the winter months. Winterizing your RV properly helps prevent costly repairs and ensures that your RV is ready to go when warmer weather arrives. Here are three reasons why you should know how to blow out your RV water lines:
- Preventing frozen pipes: By blowing out the water lines, you remove any remaining water that could freeze and expand, potentially causing pipes to burst. This can save you from expensive repairs and the inconvenience of dealing with water damage.
- Protecting your investment: Your RV is a valuable asset, and taking care of its plumbing system is crucial to its longevity. By properly winterizing and blowing out the water lines, you ensure that your investment is protected from potential damage caused by freezing temperatures.
- Peace of mind: Knowing that you have taken the necessary steps to properly winterize your RV provides peace of mind. You can rest easy knowing that your plumbing system is protected and ready for the next camping season.
Frequently Asked Questions
Can I Use a Regular Air Compressor to Blow Out My RV Water Lines?
While it is possible to use a regular air compressor to blow out RV water lines, it is important to ensure that the air pressure is regulated and not too high to avoid causing damage to the system.
How Long Does It Typically Take to Blow Out the Water Lines in an Rv?
The time it takes to blow out water lines in an RV can vary depending on factors such as the length and complexity of the plumbing system. Generally, it can take anywhere from 30 minutes to an hour to complete the process.
Is It Necessary to Blow Out the Water Lines in My RV if I Live in a Warmer Climate?
It is advisable to blow out the water lines in an RV even if you live in a warmer climate. This helps prevent any potential damage from freezing temperatures that might occur unexpectedly or during travel to colder regions.
Can Blowing Out the Water Lines in My RV Cause Any Damage to the Plumbing System?
Blowing out water lines in an RV can potentially cause damage to the plumbing system if not done correctly. It is important to follow proper procedures and use appropriate air pressure to avoid any potential issues.
Are There Any Alternative Methods to Blowing Out the Water Lines in an Rv?
There are alternative methods to blowing out water lines in an RV, such as using antifreeze or a compressed air adapter. These methods ensure that water is effectively removed from the lines, preventing freezing and potential damage to the plumbing system.
Conclusion
In conclusion, knowing how to blow out water lines in an RV is crucial for winterization. By following the steps outlined and using the necessary items, you can ensure that your RV’s water lines are properly flushed and protected from freezing temperatures. Remember to take the necessary precautions and refer to reliable sources for further information. By mastering this skill, you can confidently prepare your RV for the winter season.


